McSpeed 1969 Camaro RESURRECTION..........
This page picks up from HERE. Now that I am reunited with the Camaro, it is time to get down to business. The best finished product start with a clear and distinct plan. When building a Hot Rod car, you have to create a vision for the finished product, then work backwards from there. The goal of the vision has to be a bit lofty, yet totally realistic in terms of skills, resources, and of course the budget. My budget for this project is seriously tight (as in..NONE), so I have to be realistic in my vision and lean on my creative abilities to overcome my budget weakness. My inspiration comes from www.pro-touring.com and www.detroitspeed.com, including numerous other sources including www.lateral-g.net.
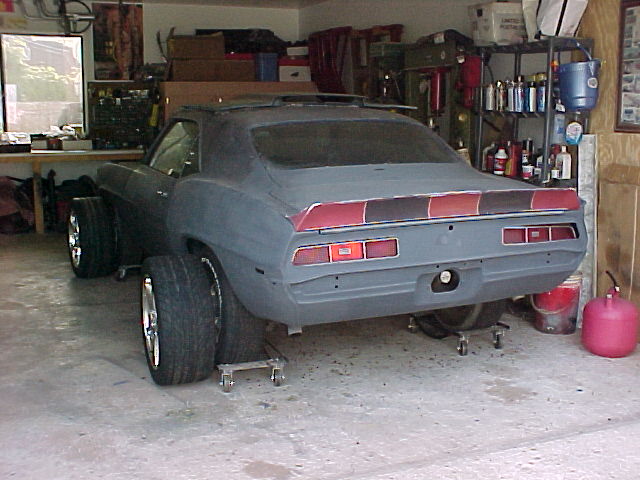
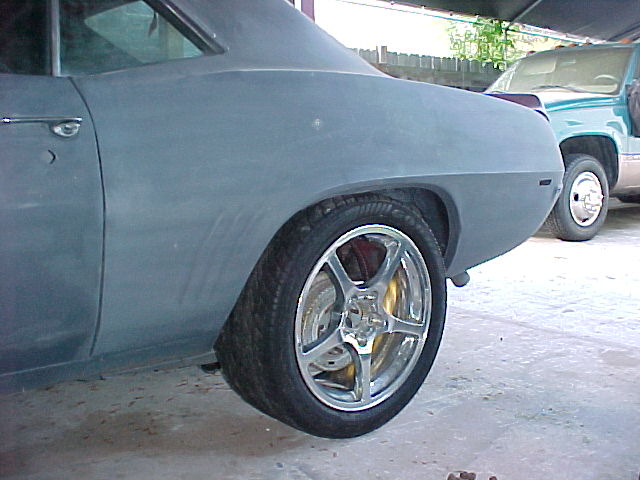
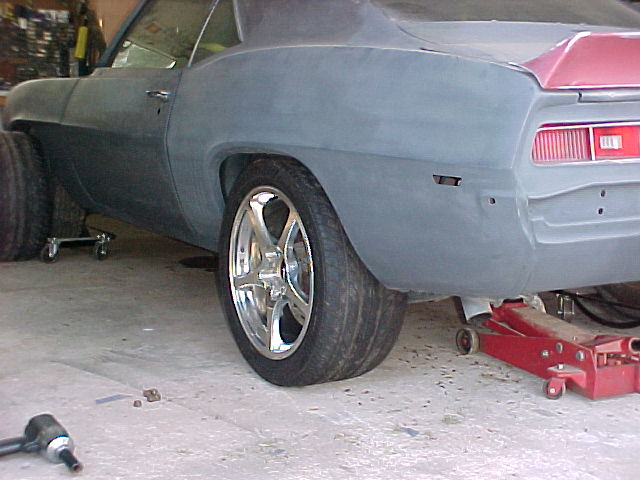
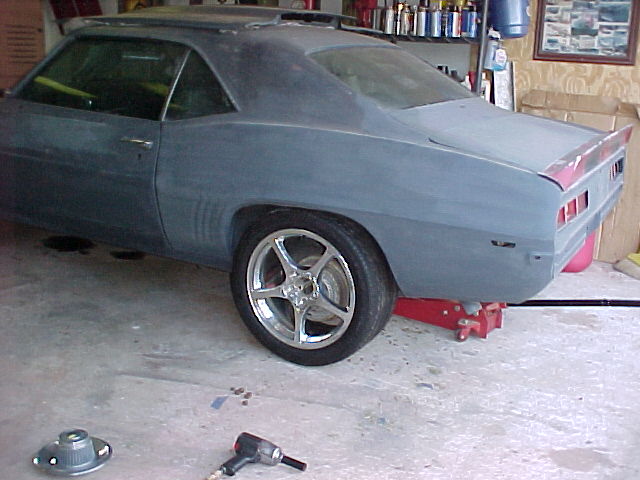
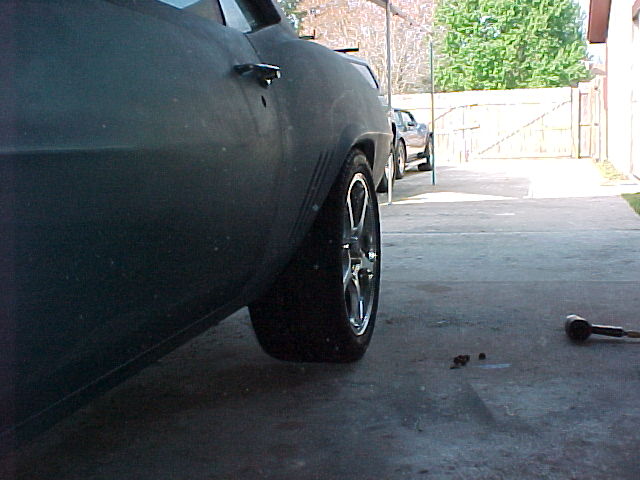
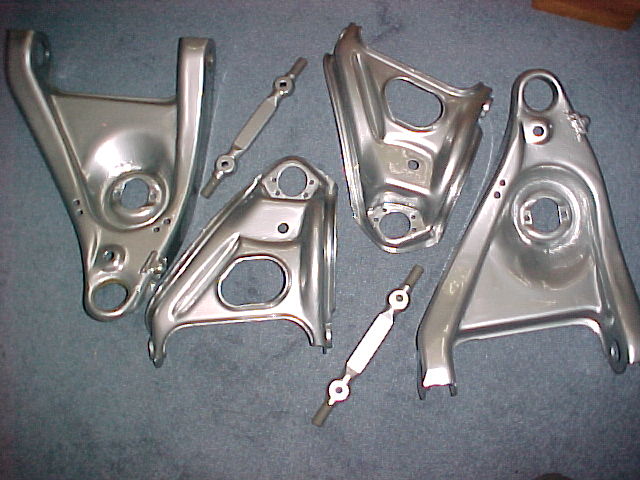
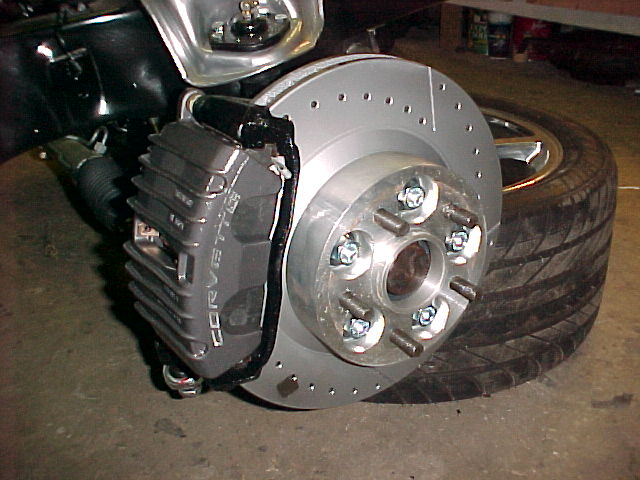
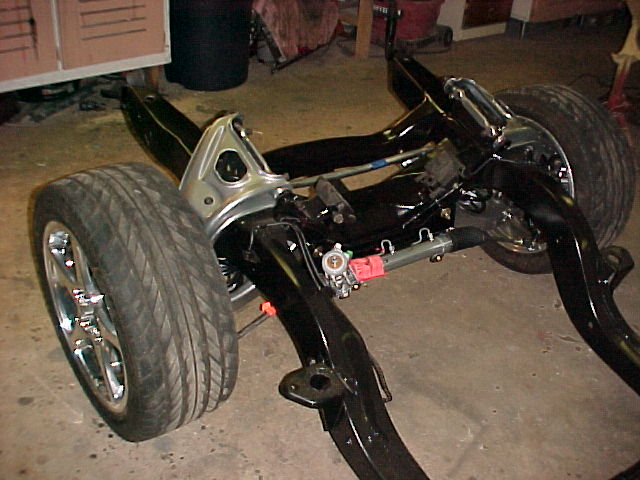
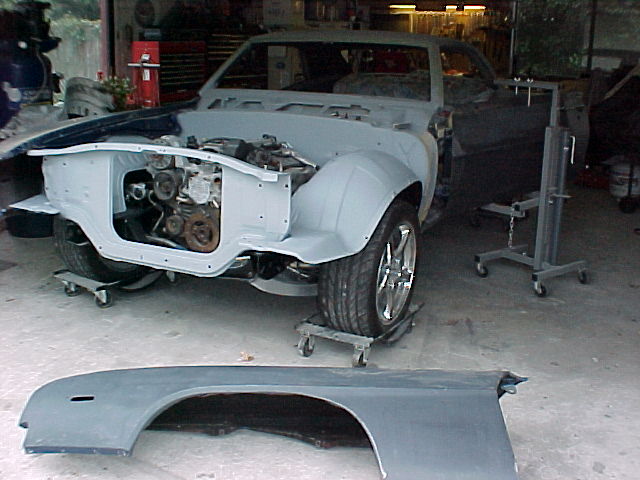
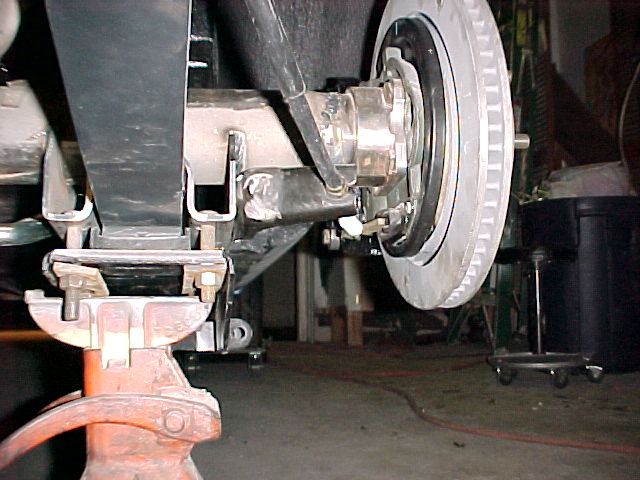
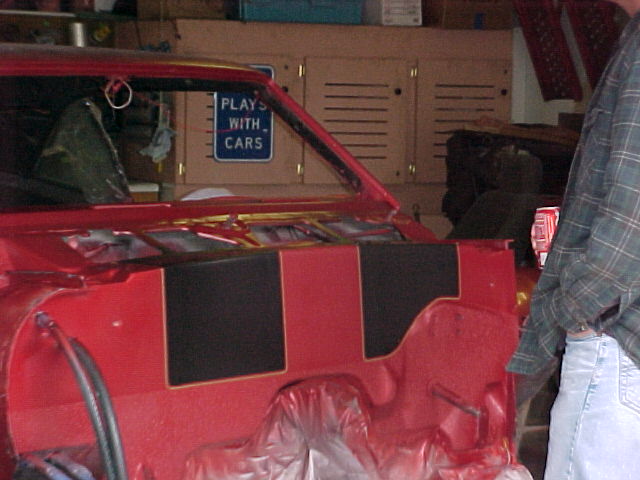
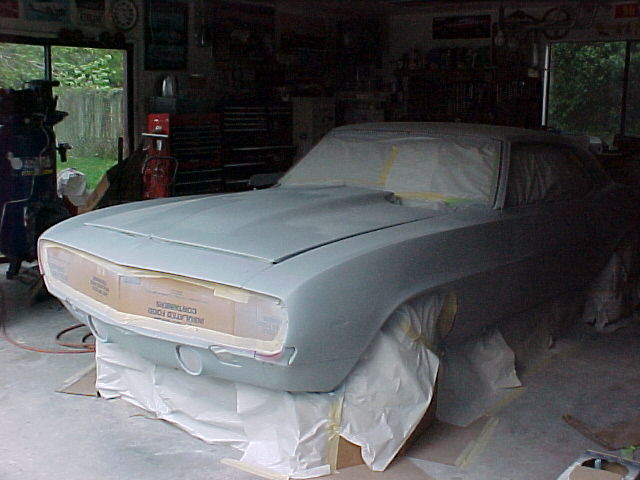
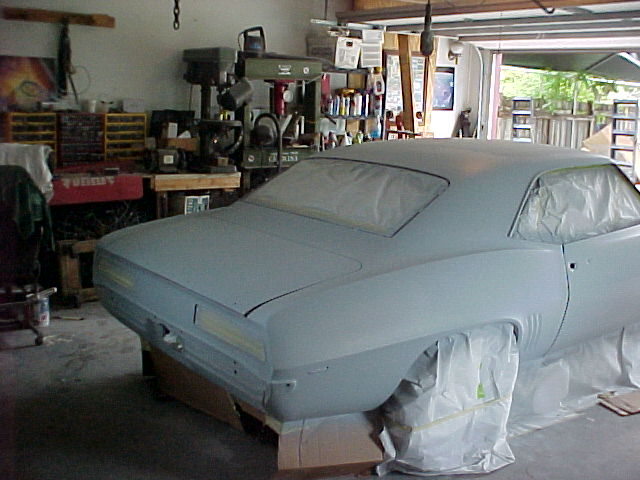
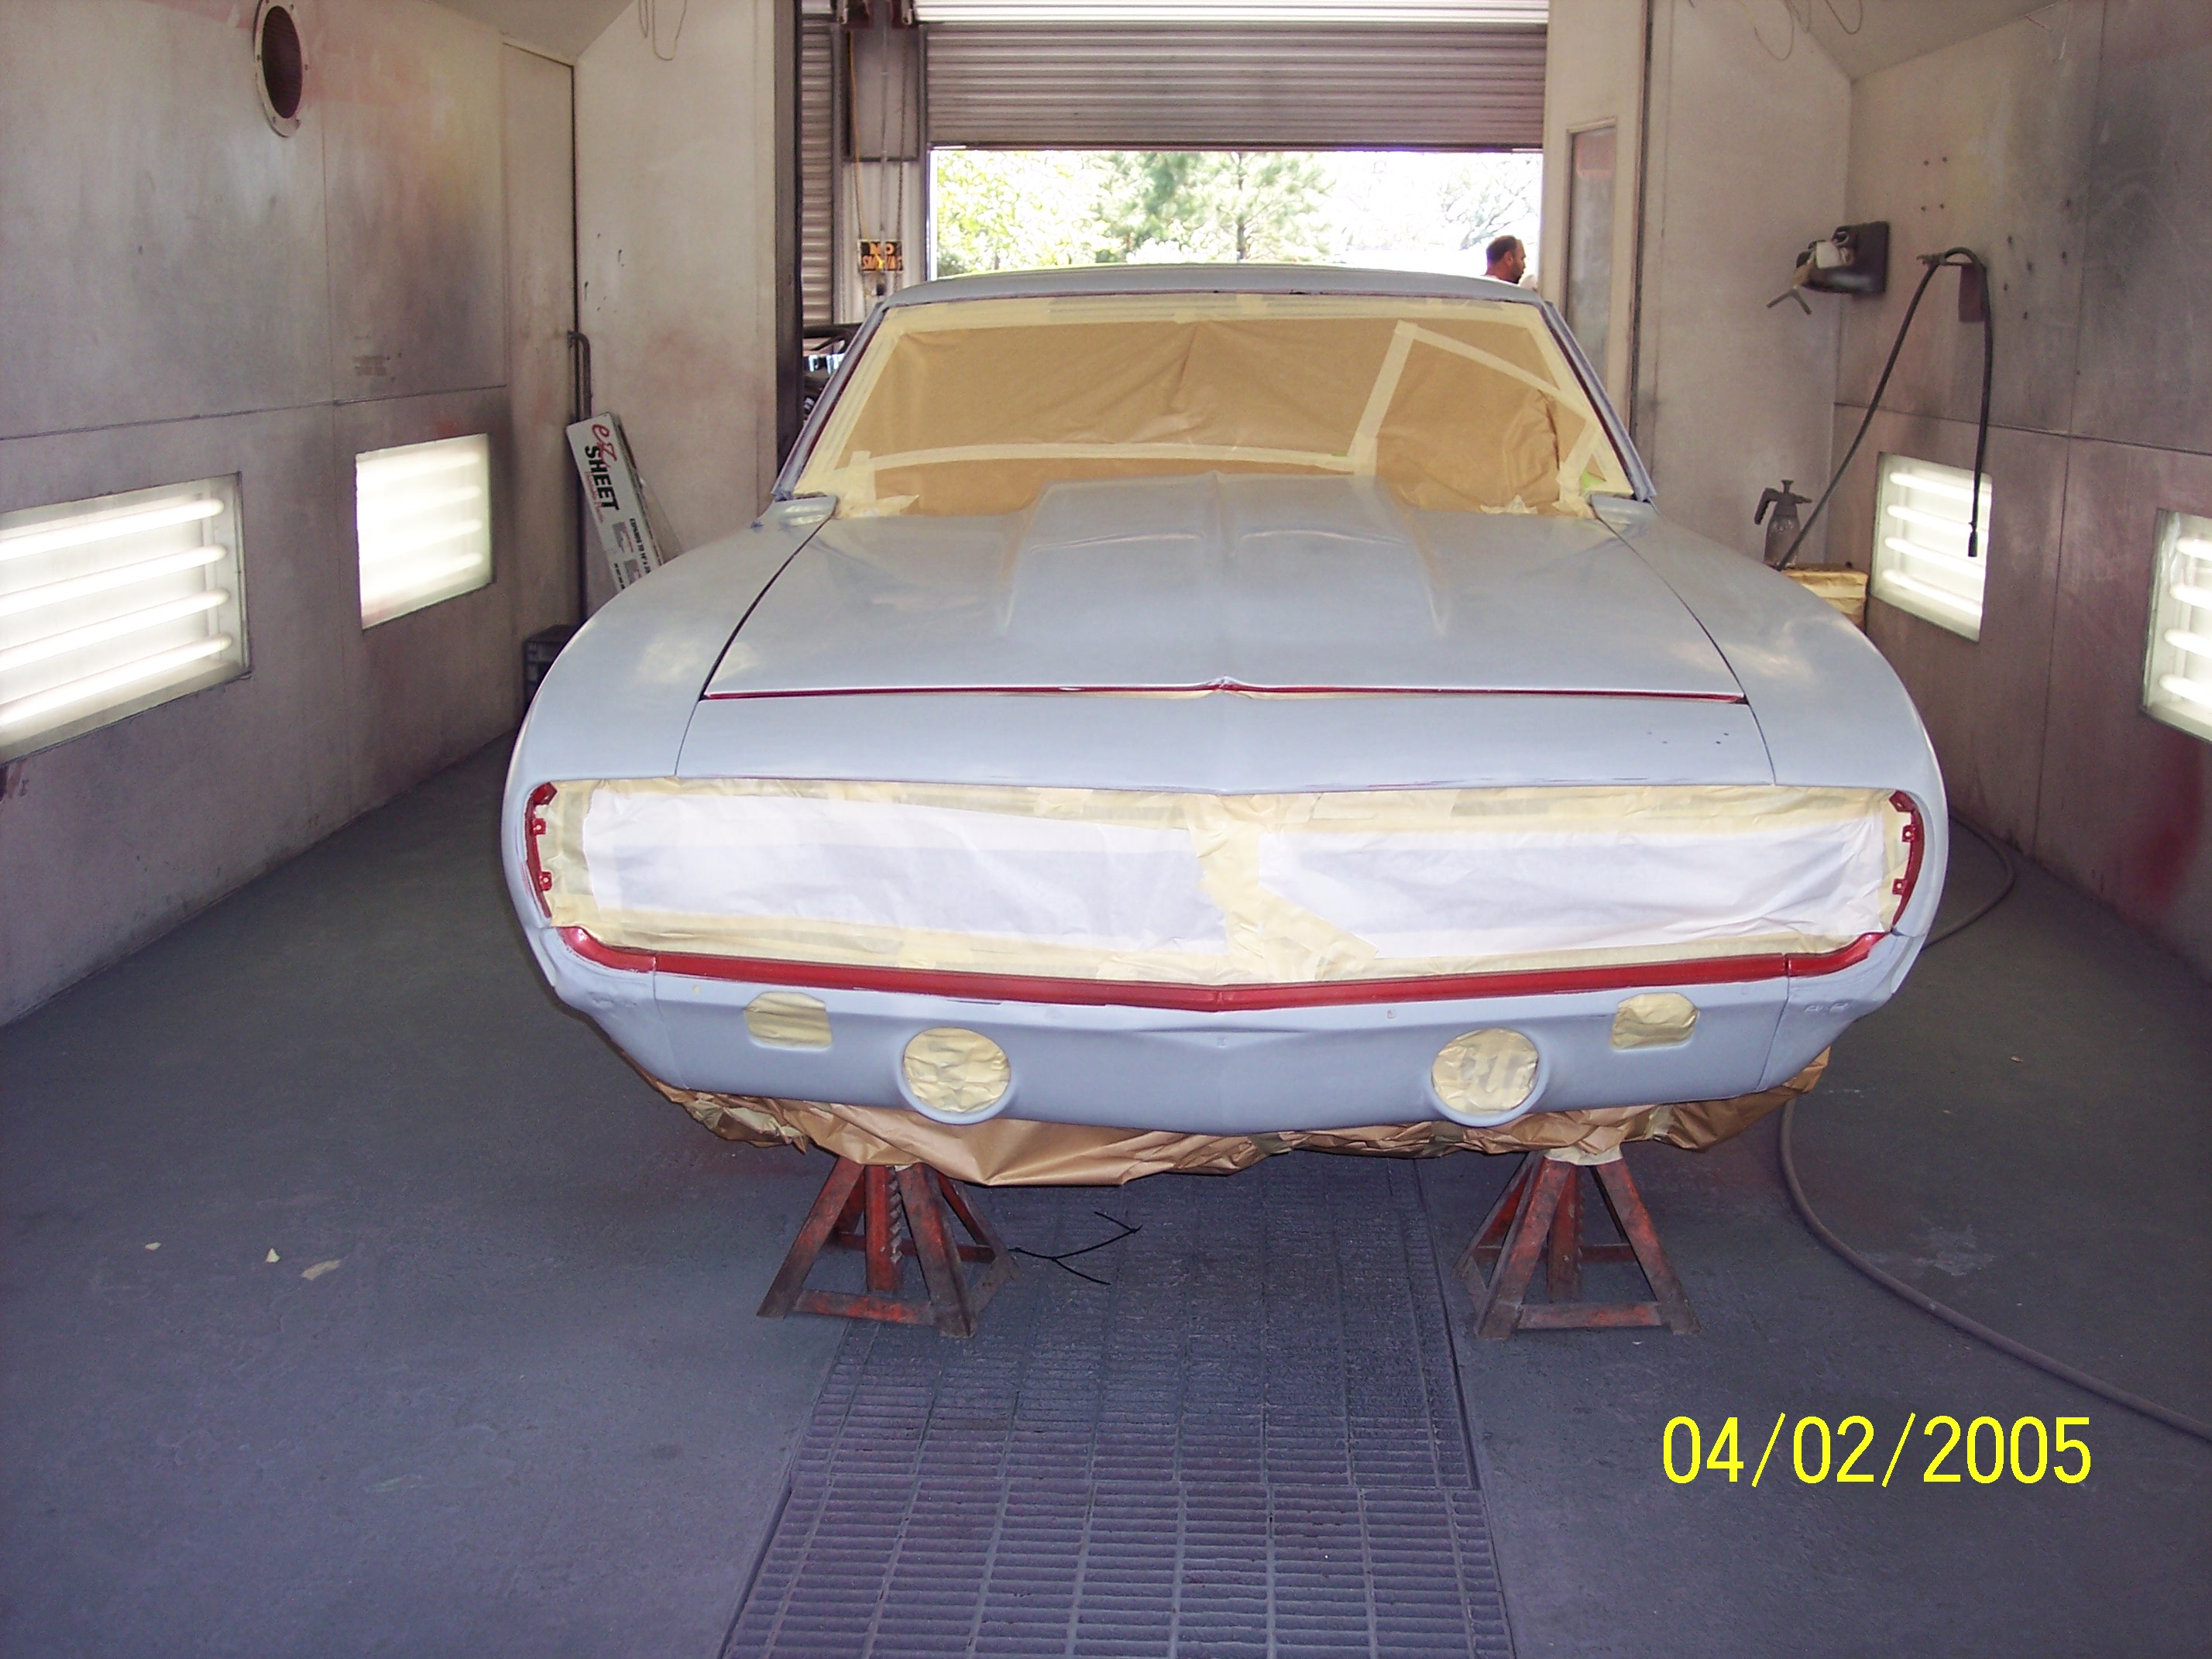
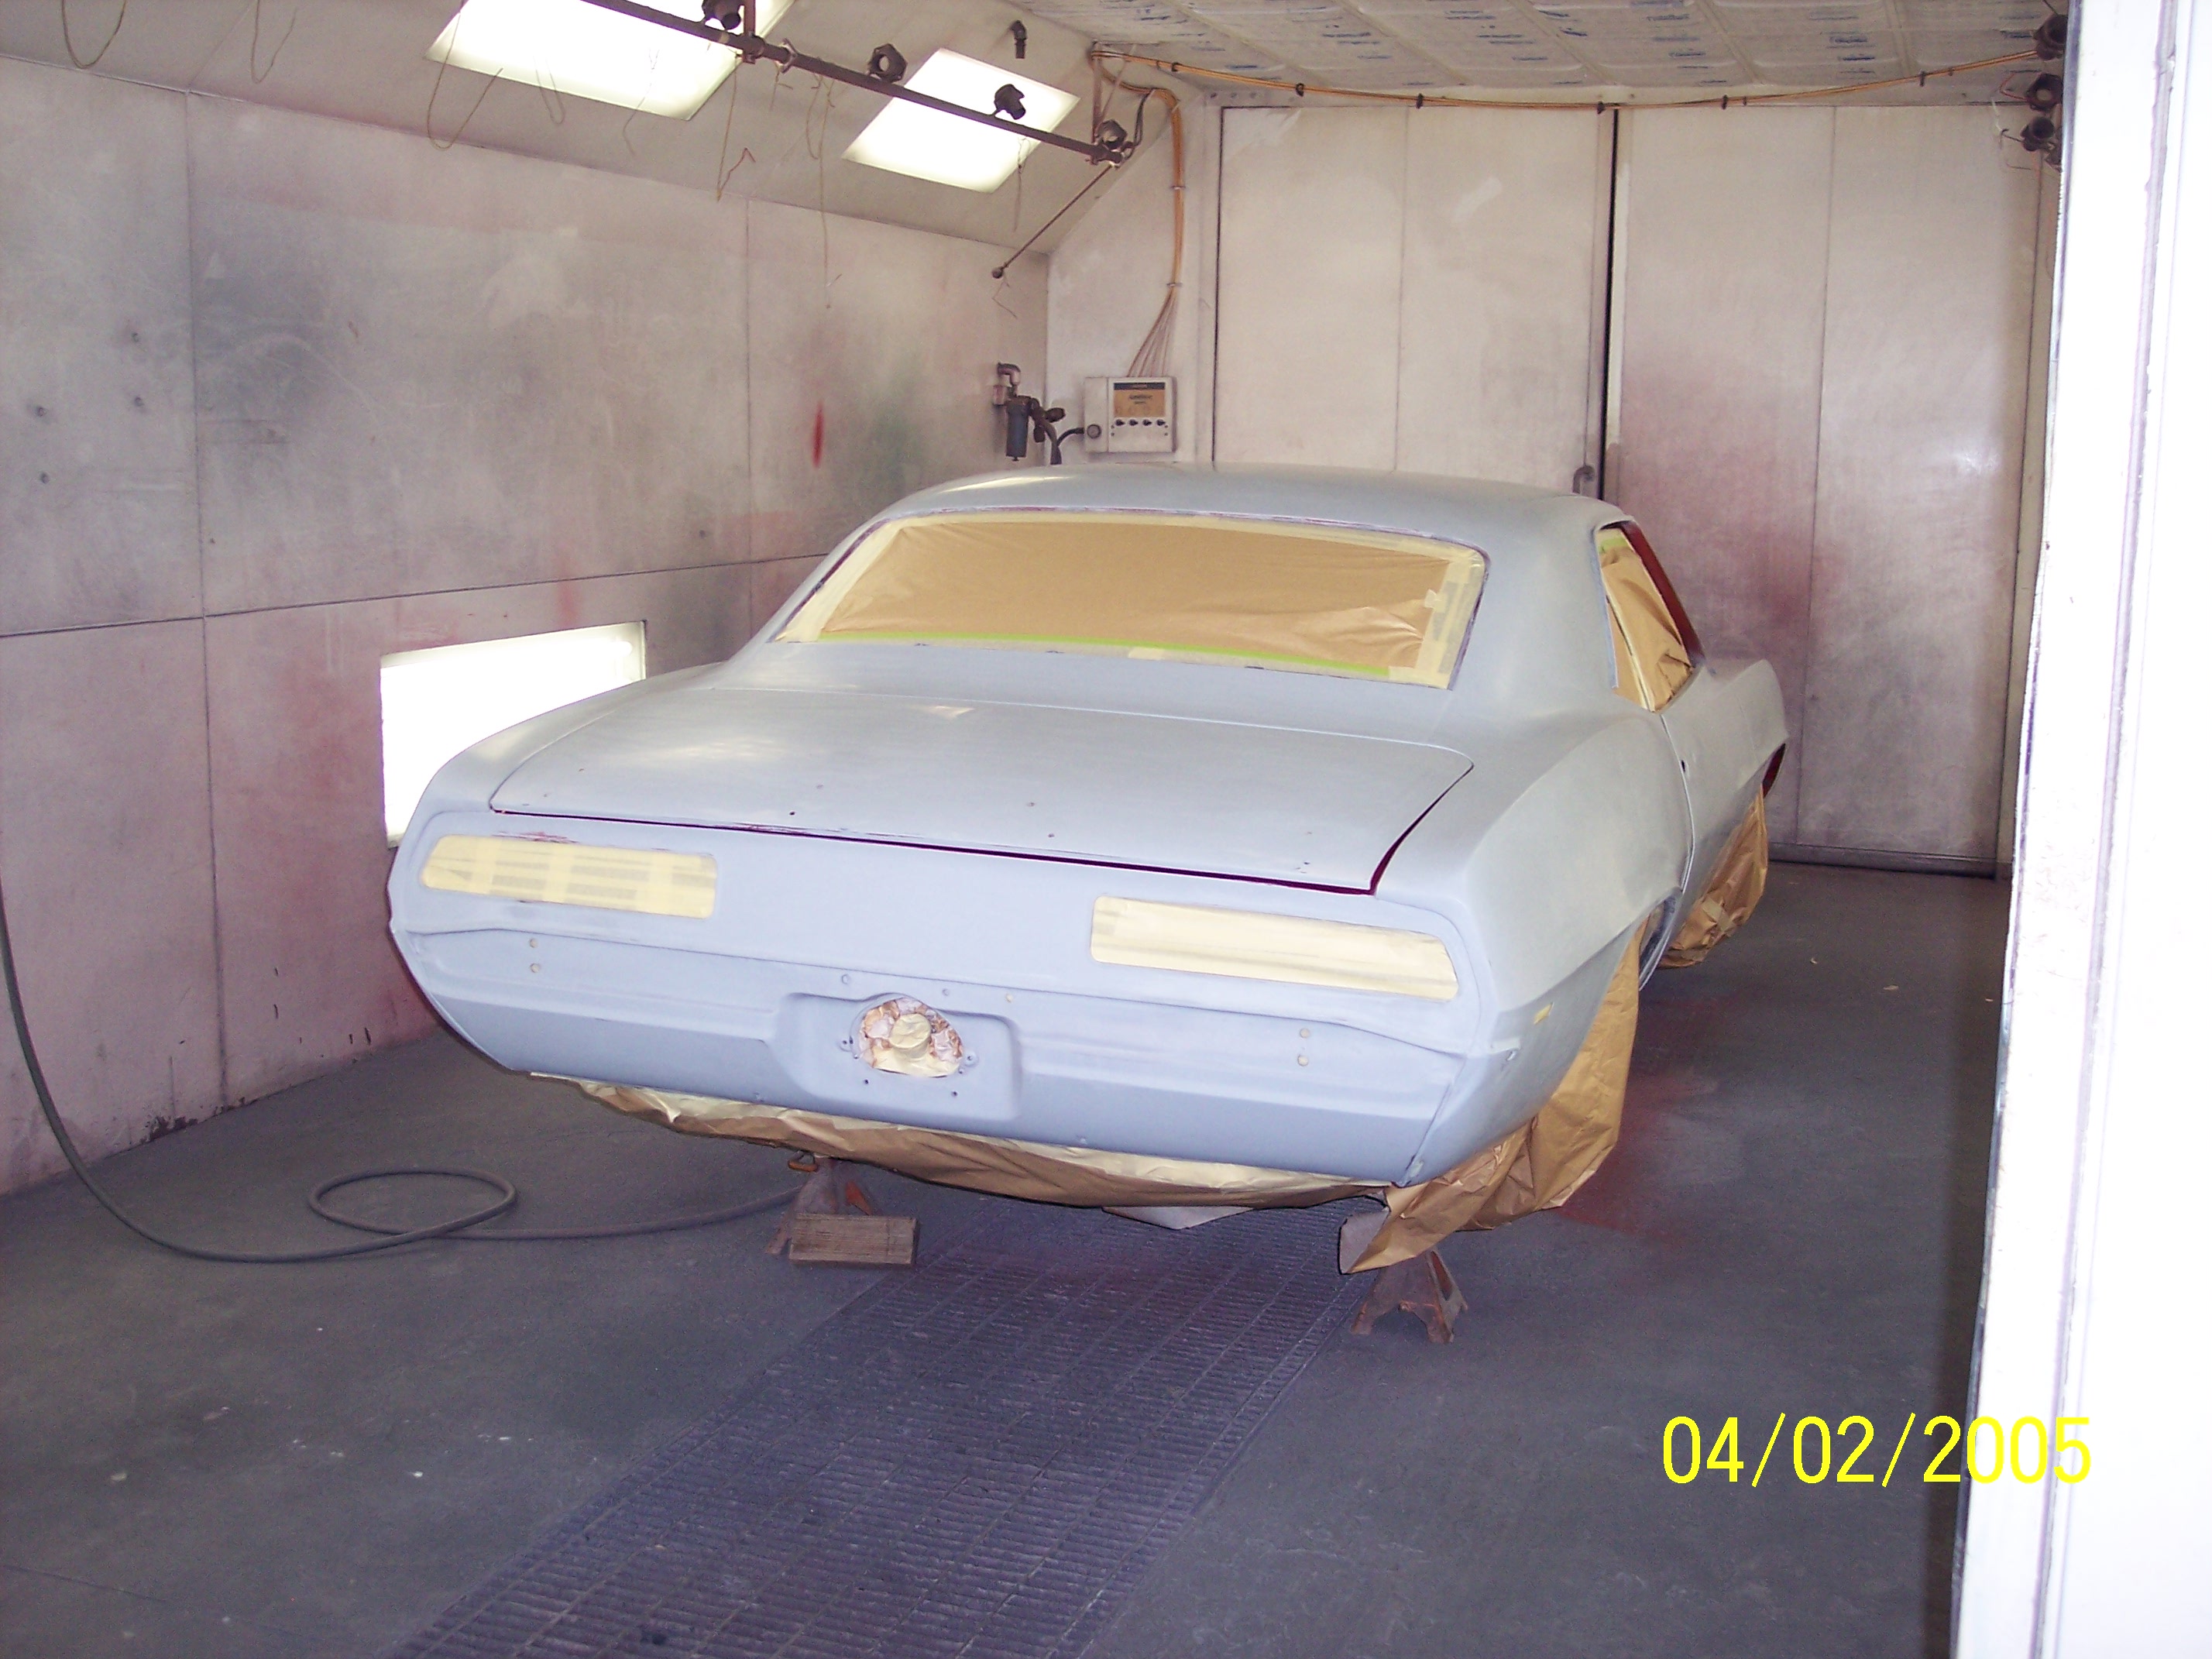
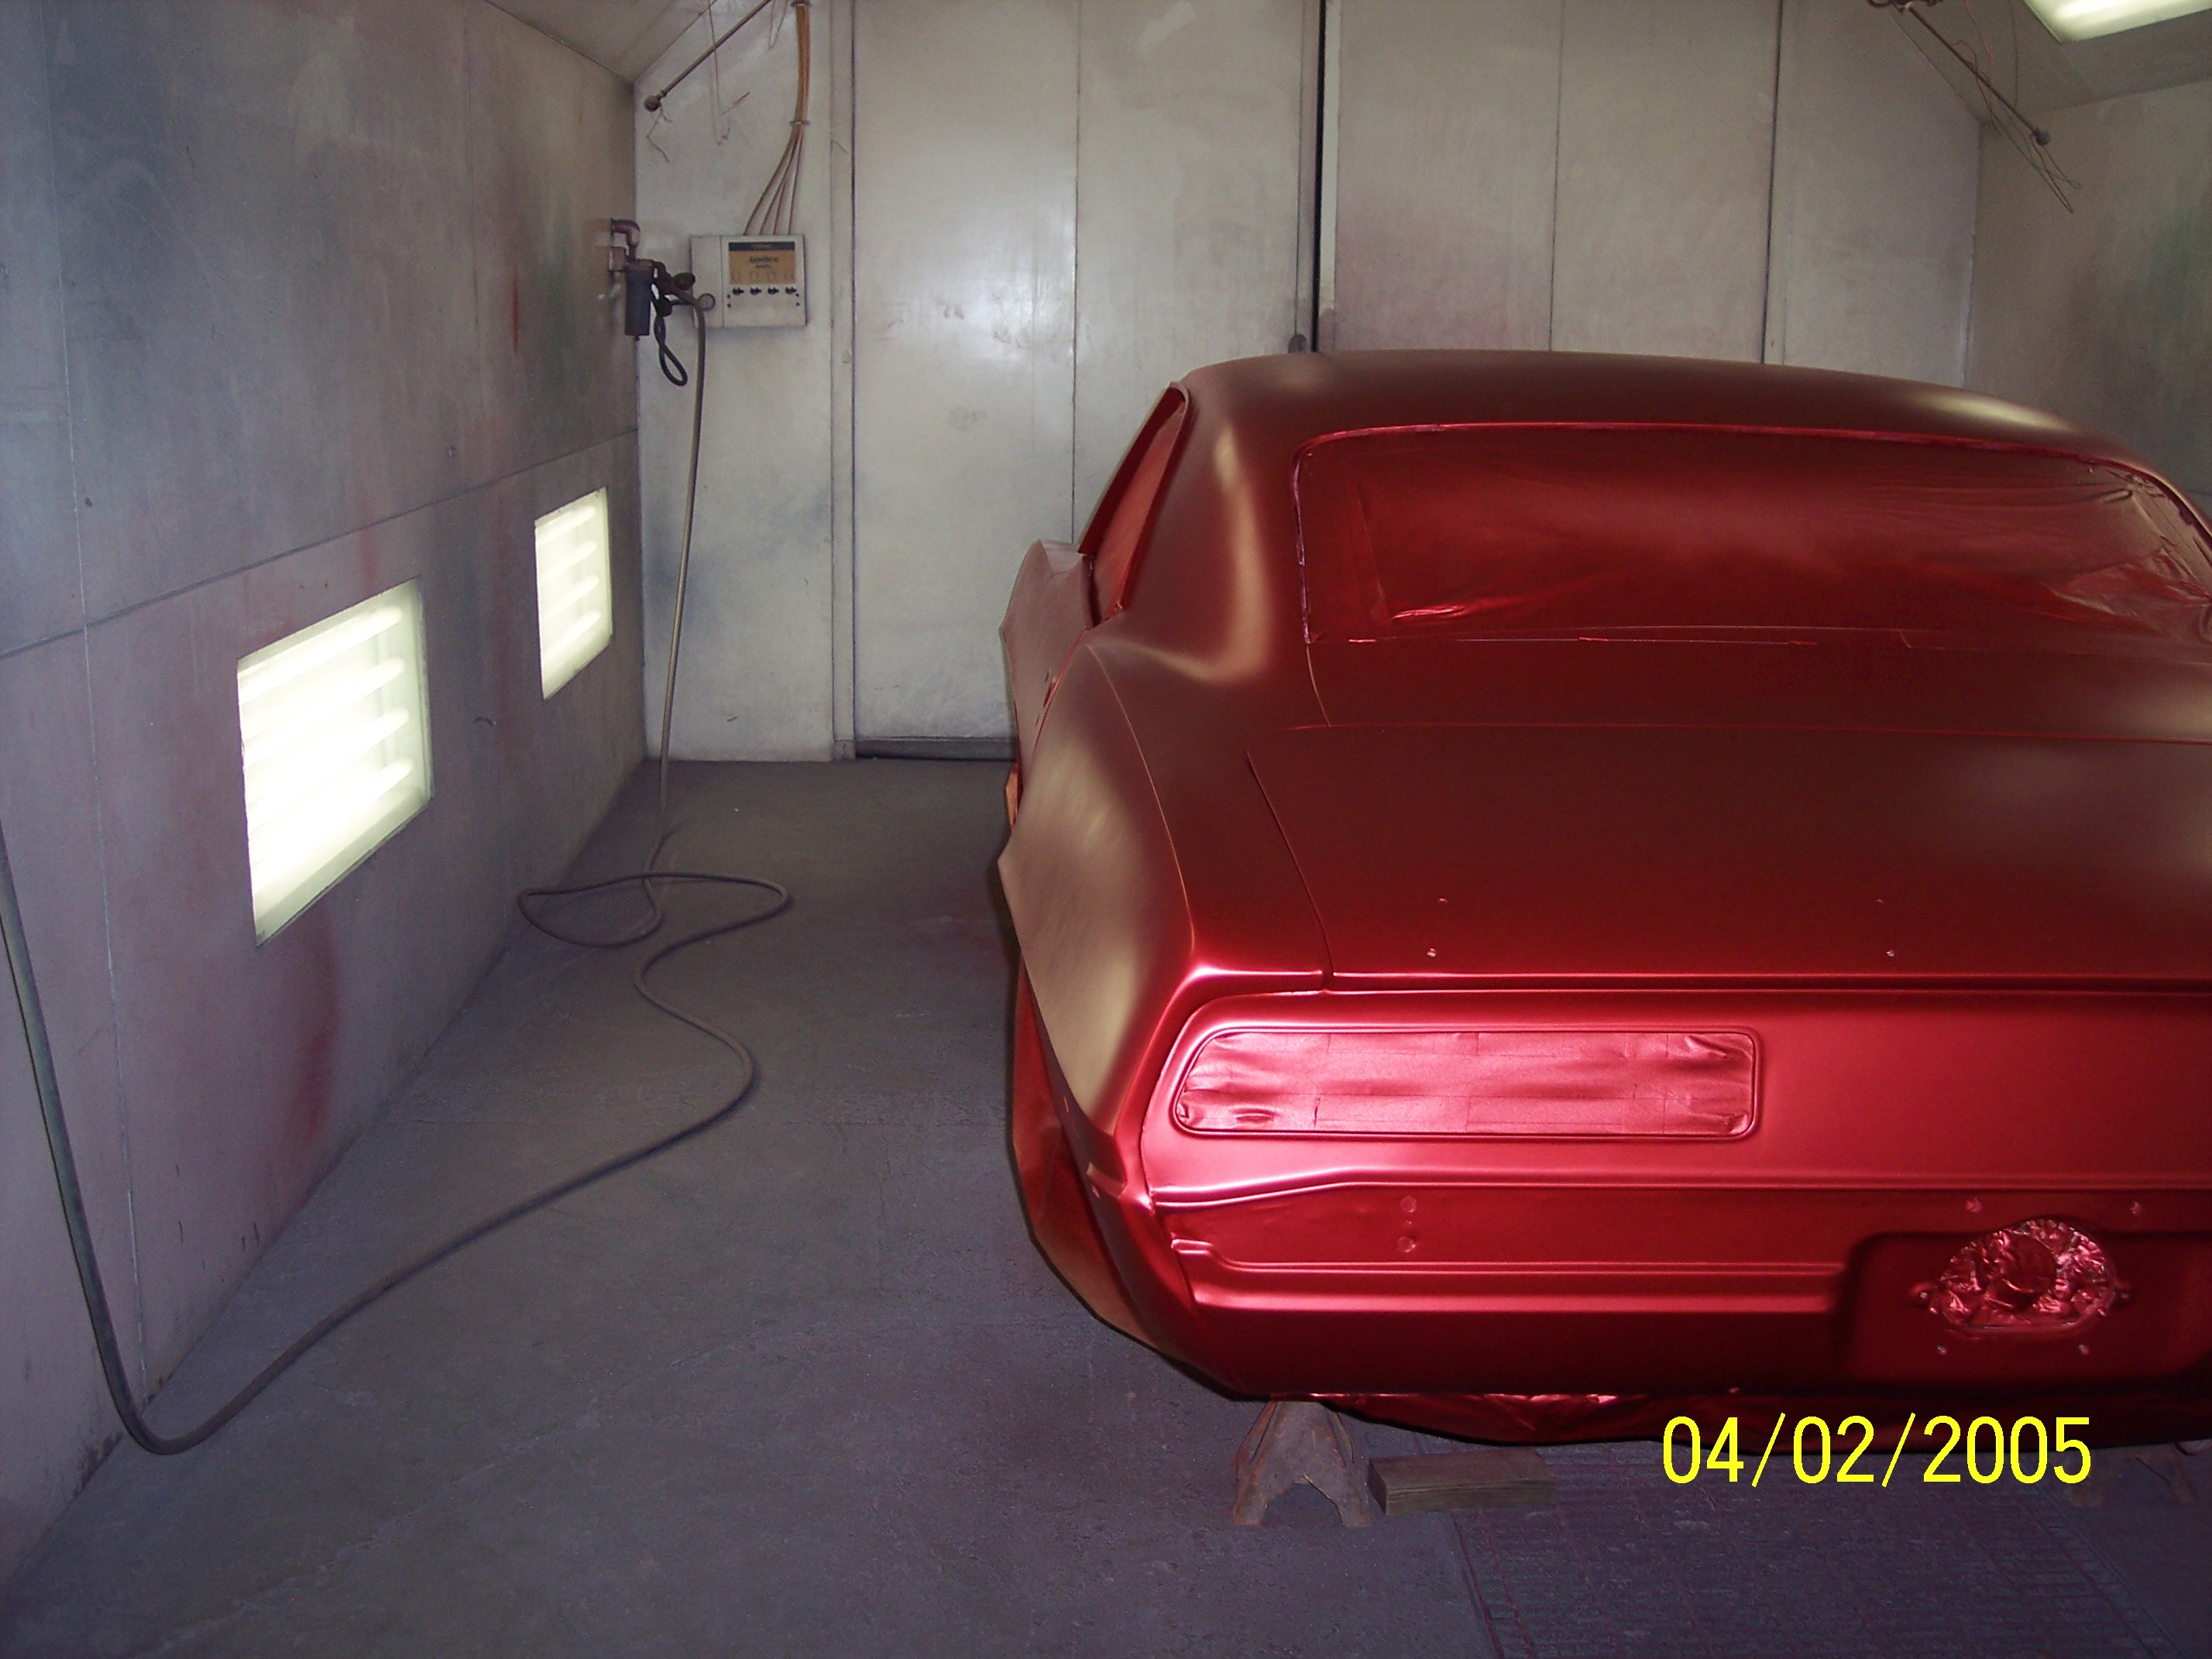
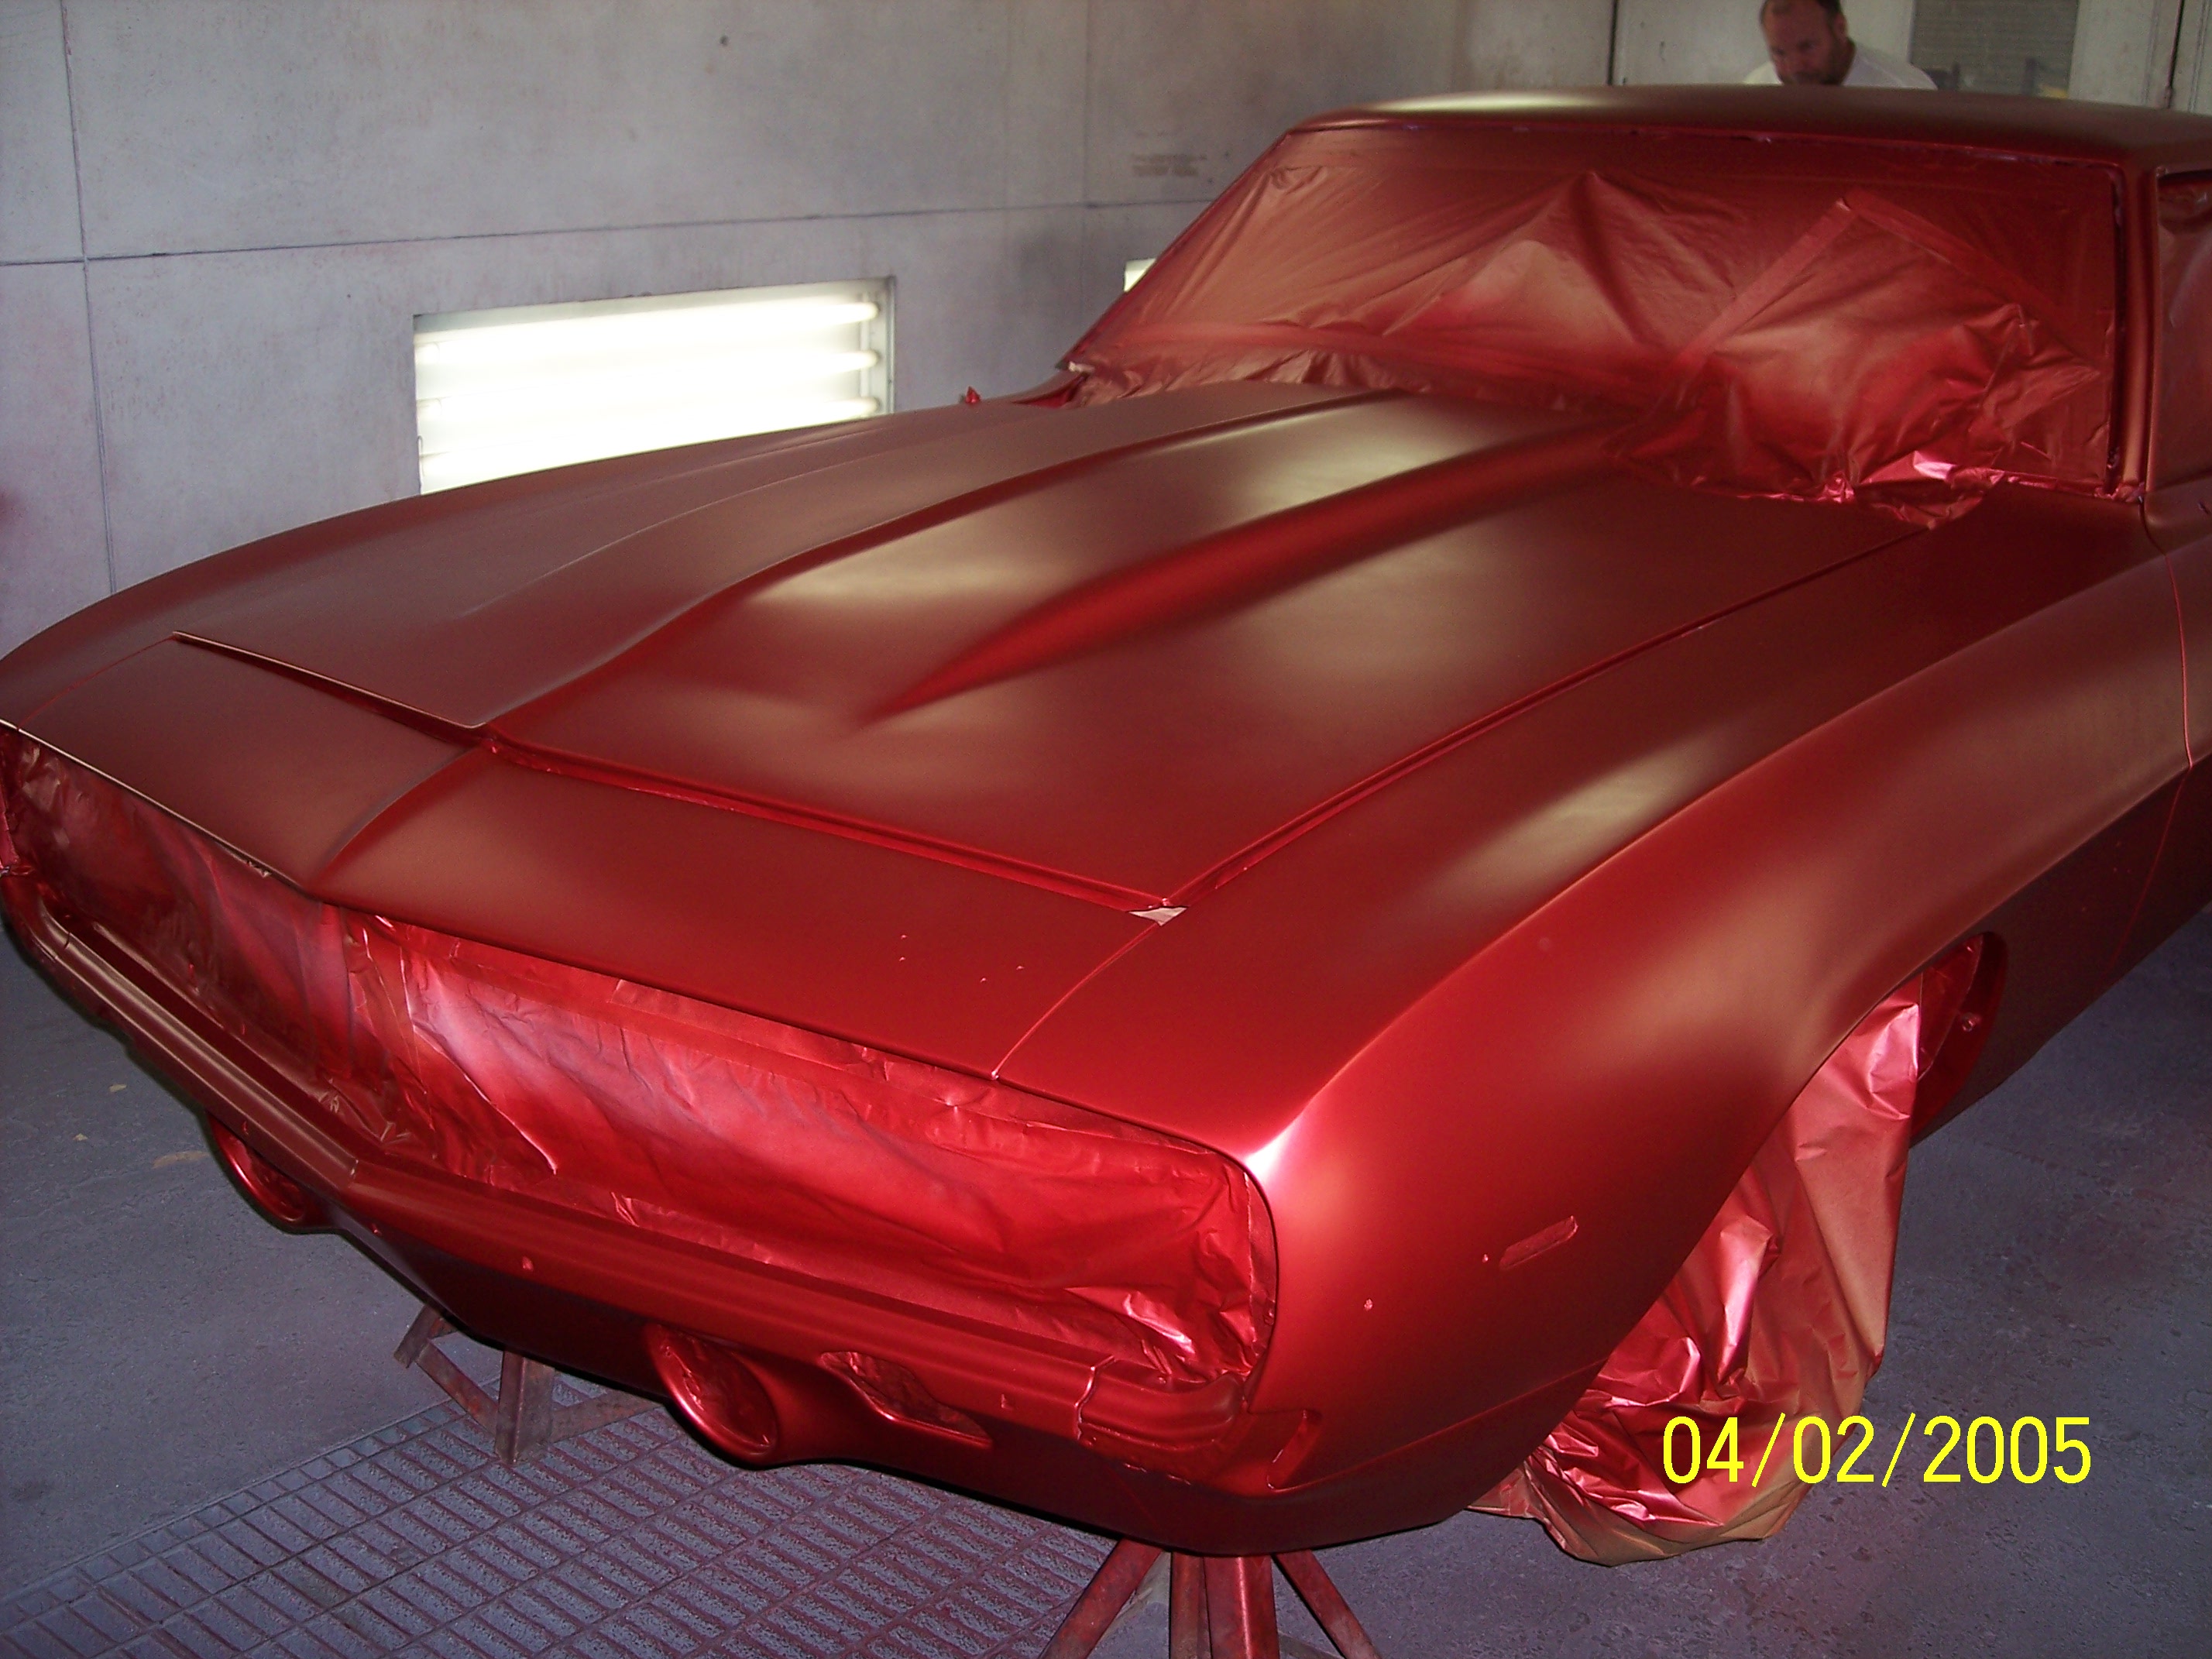
The 69 Camaro will be riding on 2000-2004 Corvette wheels (17" front 18" rear). Stopping power will come via C5 front brakes through Touring Classics. The rear axle will be custom built to length for the new wheel offset including a set of 1LE disc brakes. Other suspension items will be basically stock with new poly bushings. The exterior paint and body will look exactly as it did when I finished it the first time in 1986. The interior will be stock black, less some custom gauges and stereo options. Under the hood, the firewall will be shaved smooth. Power will be supplied via a 2000 LS1 from a Trans Am with a 4L60E auto trans and 3.5 Ford 9" outback.
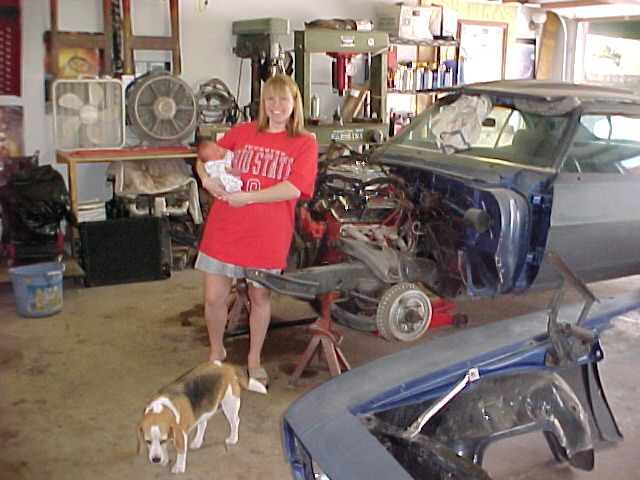
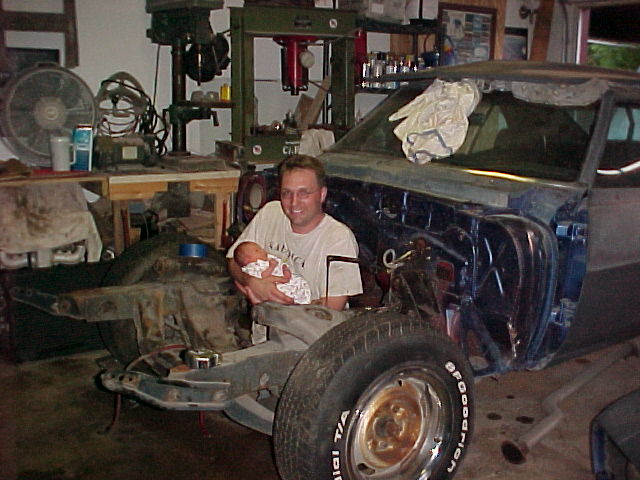
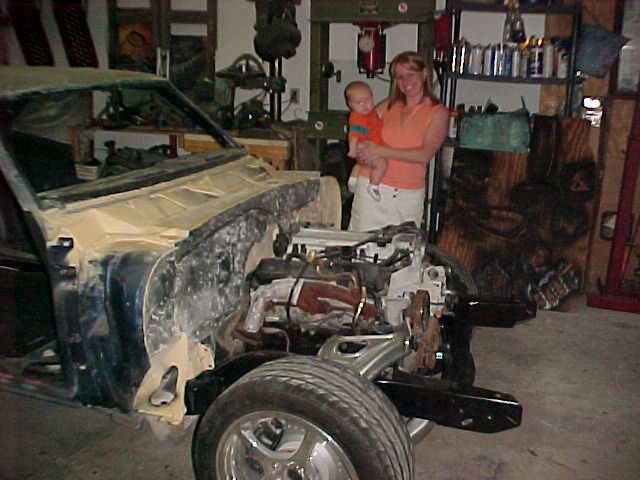
Follow along as we kick of the process with the help of my loving wife Nikki, and our new son Garrett.... Click on the thumbnails for a larger view.


3/20/04


03/23/04

03/29/04
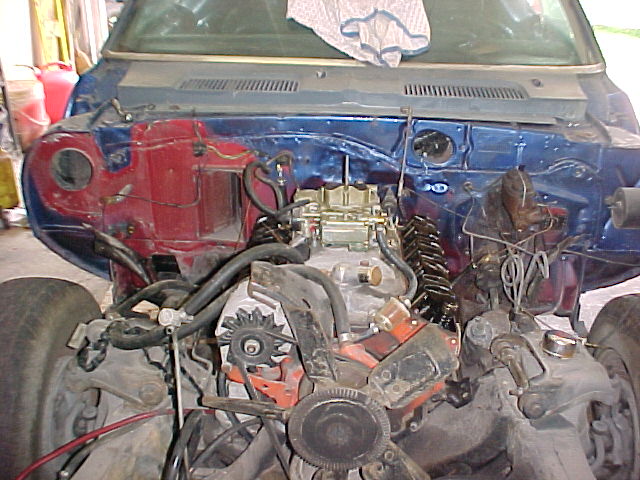
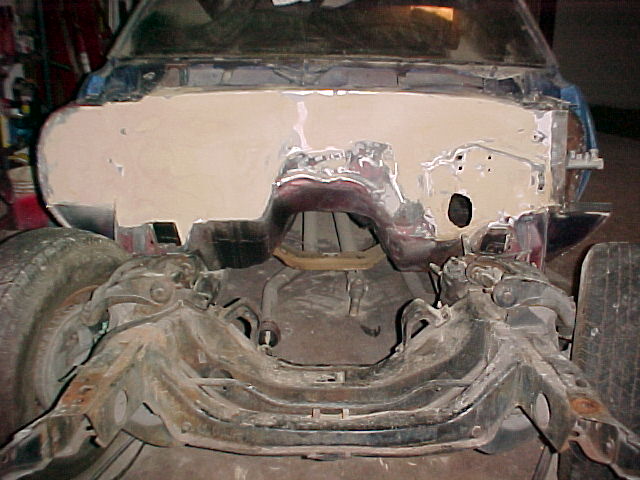
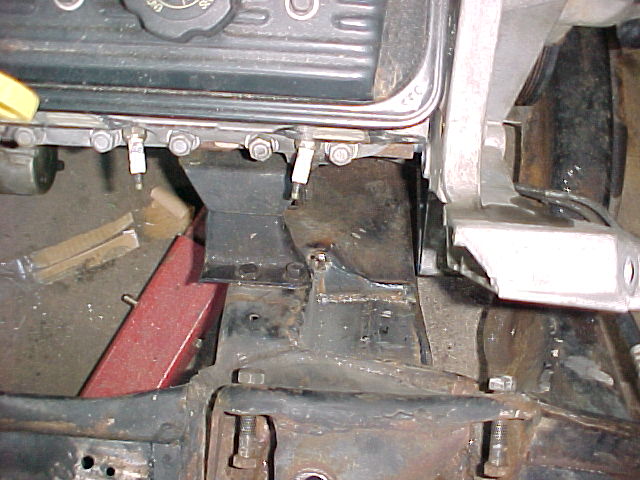
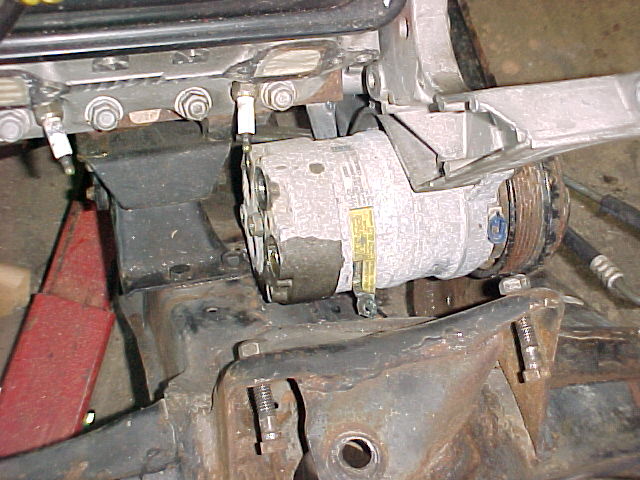
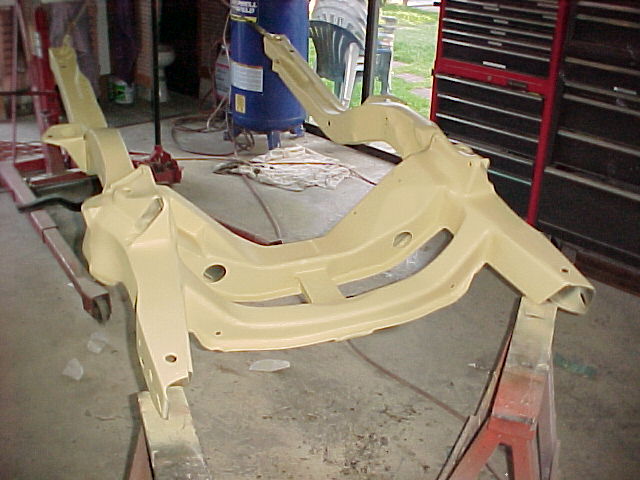
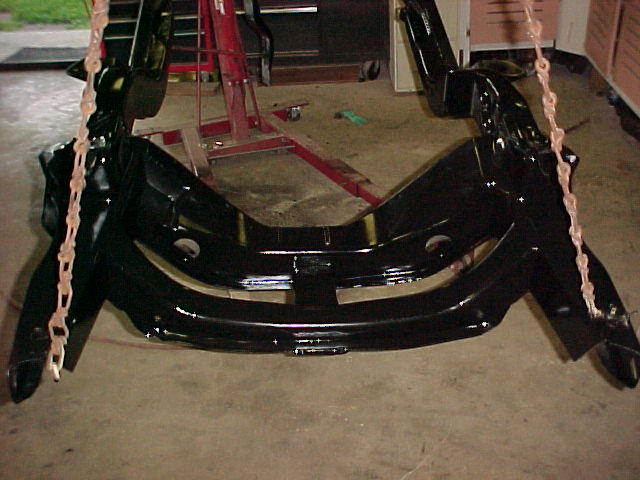
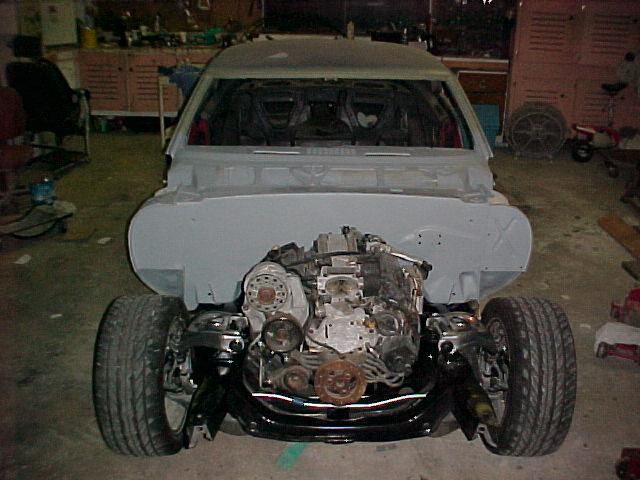
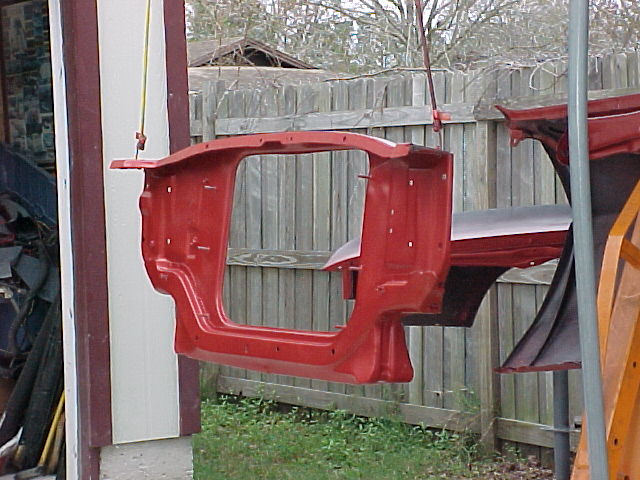
I have decided to focus on the sub frame and engine bay at this time. I am test fitting the individual components. I am going to run a LT1 engine from a 95 Z28. The accessory brackets interfere with the frame. This requires a "notch" to be cut and welded for clearance. I am also grinding, welding, and filling smooth imperfections and unused holes in the sub frame. It will be topped off with a semi gloss coat of POR 15.


4/17/04

04/24/04
5/1/04
5/10/04
5/25/04


5/30/04
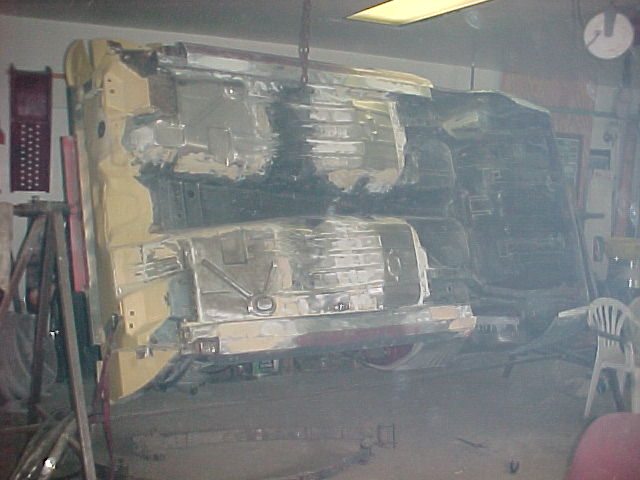
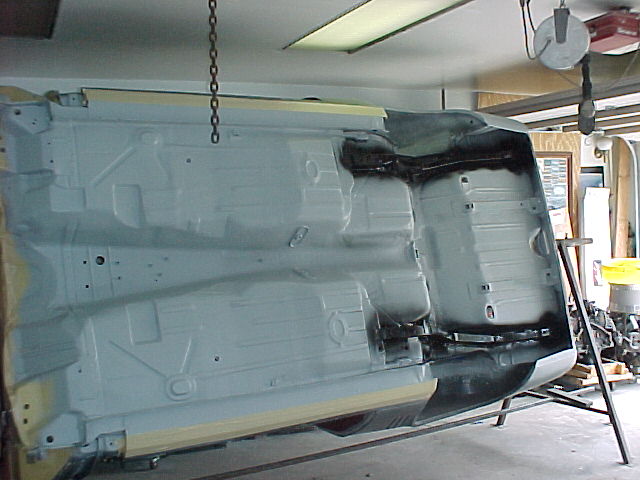
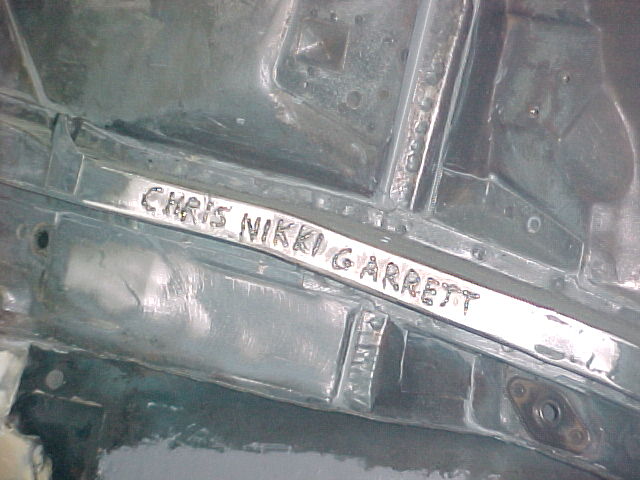
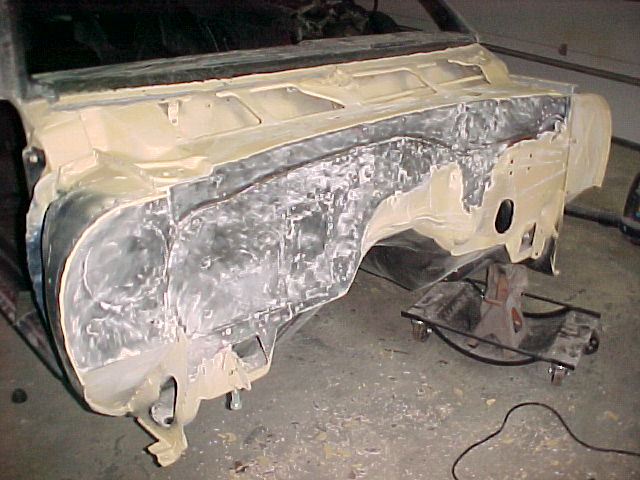
The next part of this project was to "perfect" the floor pans. The shop that was working on it while Mr. Rice had the car installed a new floor pan on the passenger front side and new trunk pan. In hind sight I realize I should have cut the entire floor out and started over, but....I tend to do things the hard way. I purchased each additional individual floor pan. My dad and I had "made" floor pans in the rear that were still holding pretty well, but out of the question for this level of "restification" to the car. So, I cut, welded, ground, smoothed, filled, sanded, self etch primed, urethane primed...and (are you out of breath yet?)...topped it off with POR 15 on the rear rails and truck bed liner spray on the remainder of the floor. Now we have a new trunk ,floors, and a new lease of life. Man...it looks SHARP! Plus, I welded CHRIS NIKKI GARRETT into the right rear frame rail. Just an added personal touch.

8/01/04
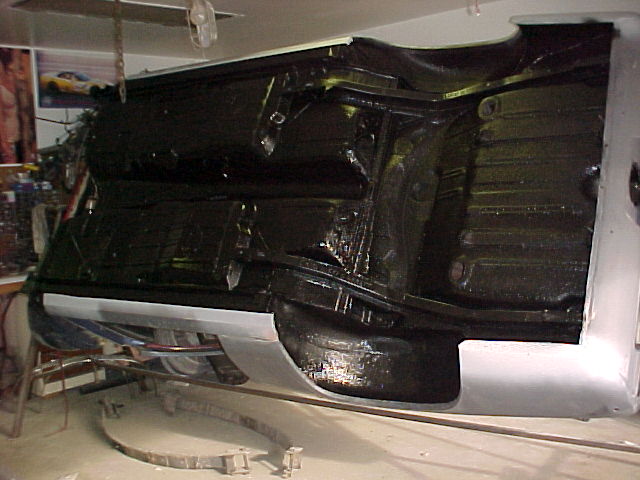
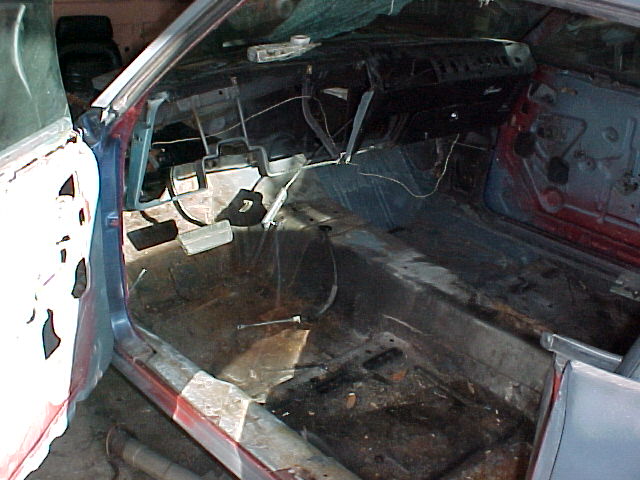
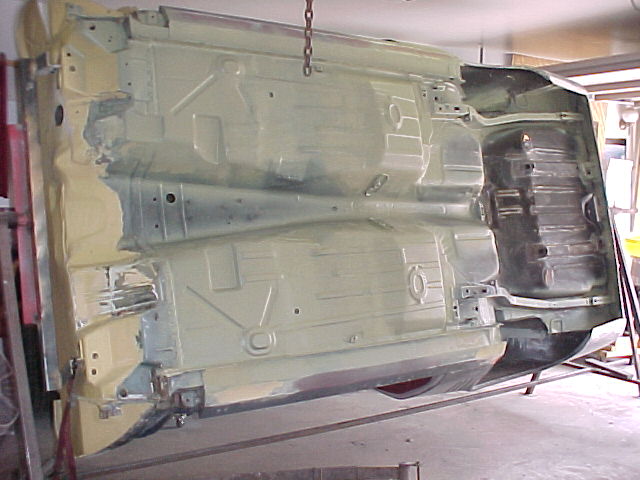
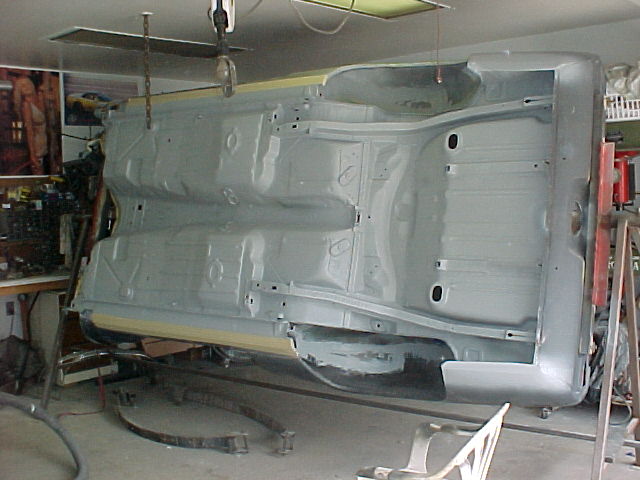
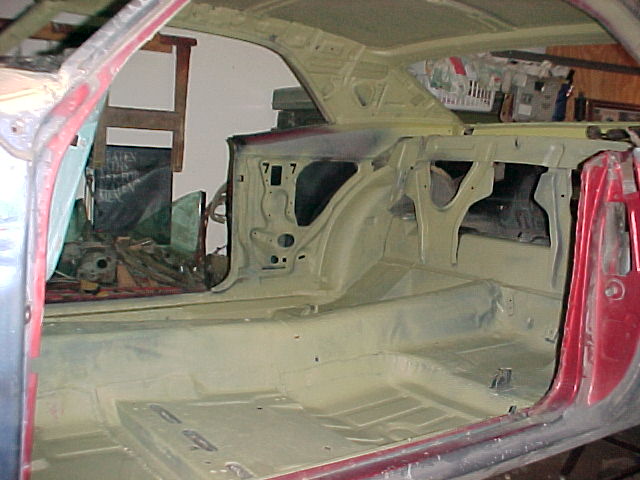
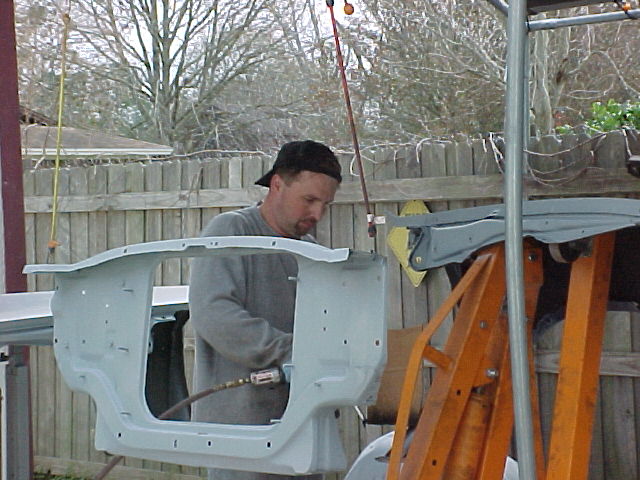
The next phase of this project included prepping the inside of the car. This meant blasting, sanding, cleaning, and seam sealing the entire inside (including the ceiling). This is followed by metal etching primer then a generous coating of truck bed liner spray.
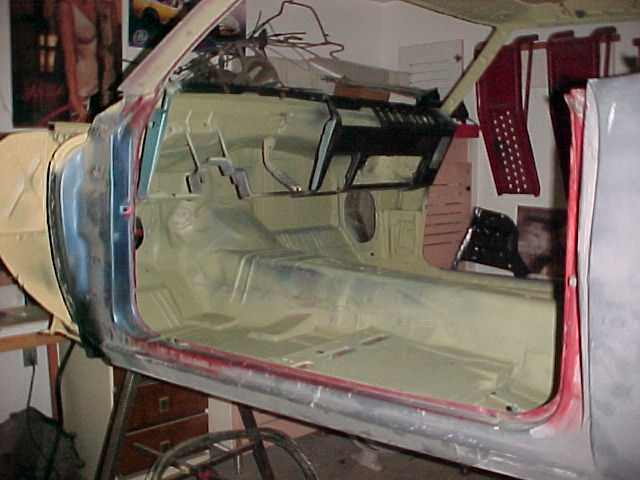
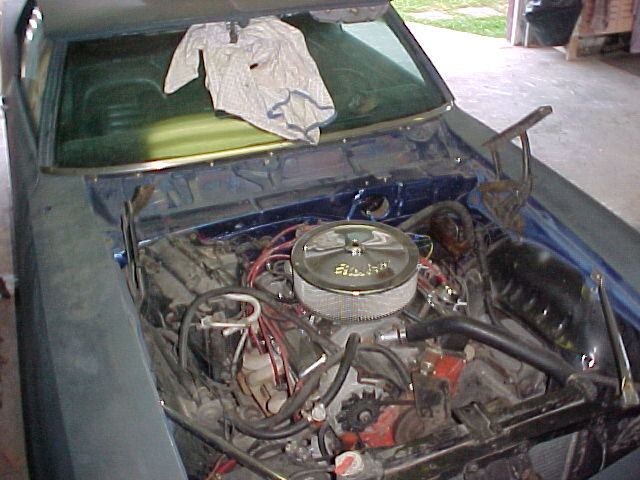
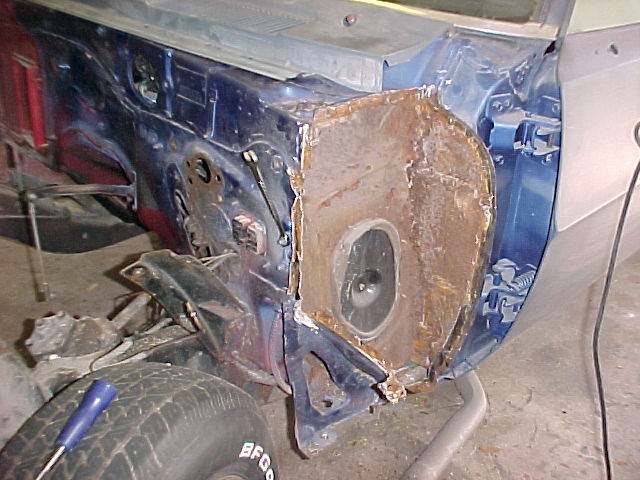
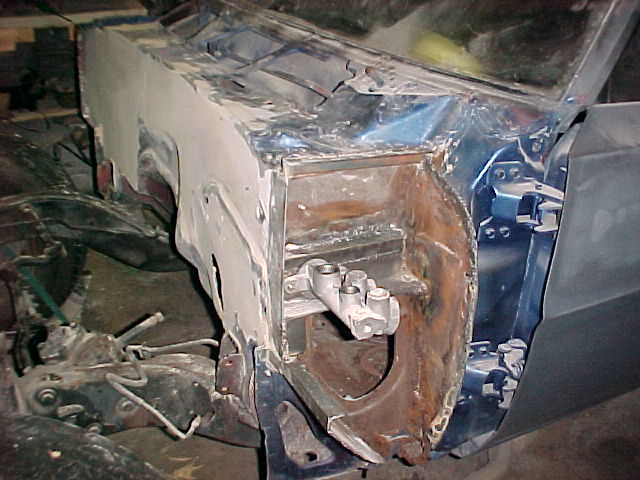
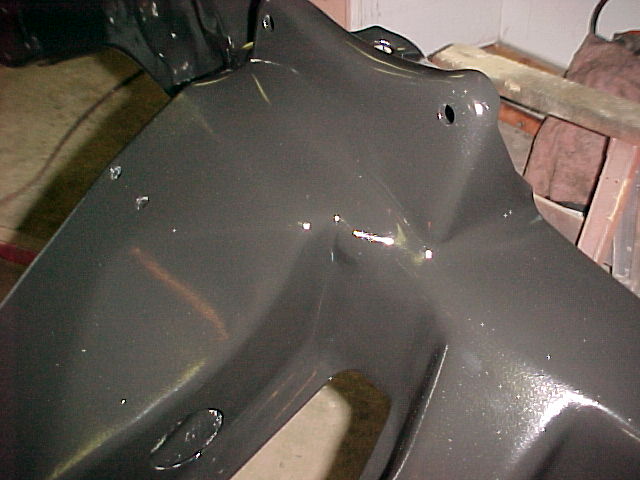
A few steps forward, and a few back. I decided I was not happy with the way I had shaved the firewall. I welded closed the holes then basically filled it up with bondo. I came to the conclusion this was a not a wise idea as the bondo would eventually crack. So, I picked and wire wheeled it all out (with some major damage to my left pointer finger..OUCH!). I test fit the LT1 donor engine and made a template of cardboard. I am having my buddy Jimmy Britts (he made the roll bars for Killer), cut a precision plate that I can weld across and fill in. This will be smooth with no worries of cracks. I am also dropping the center section down as the LT 1 does not need a recess for the distributor. It should look pretty trick and be very professional.


Metal Etch Primer
08/29/04
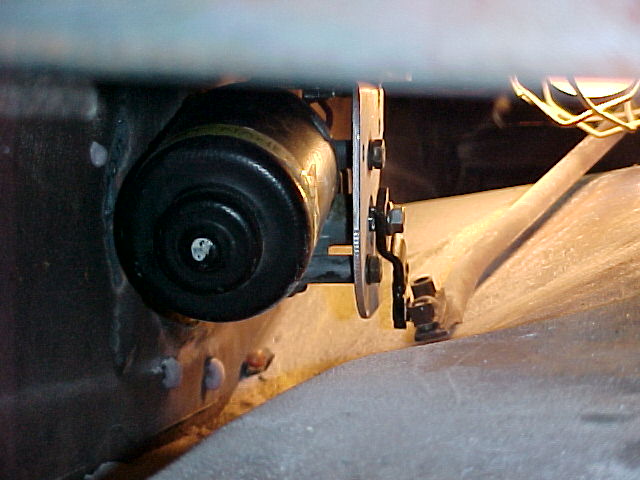
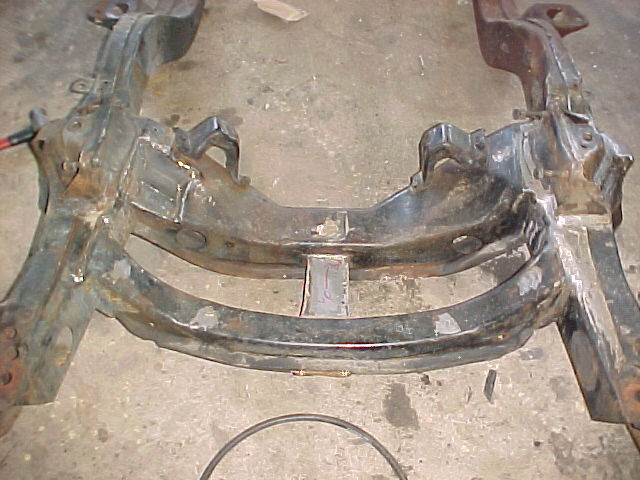
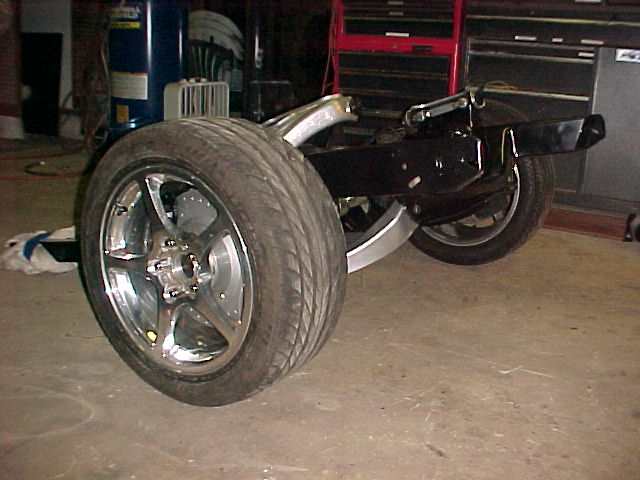
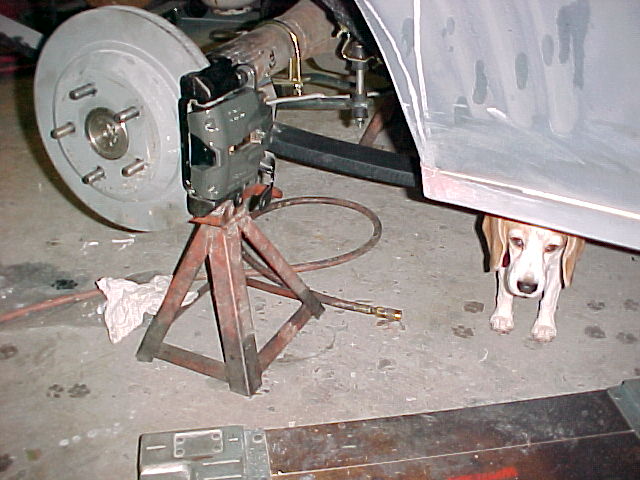
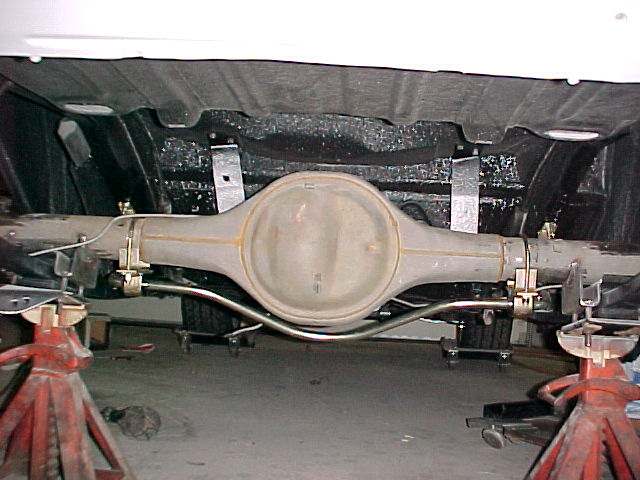
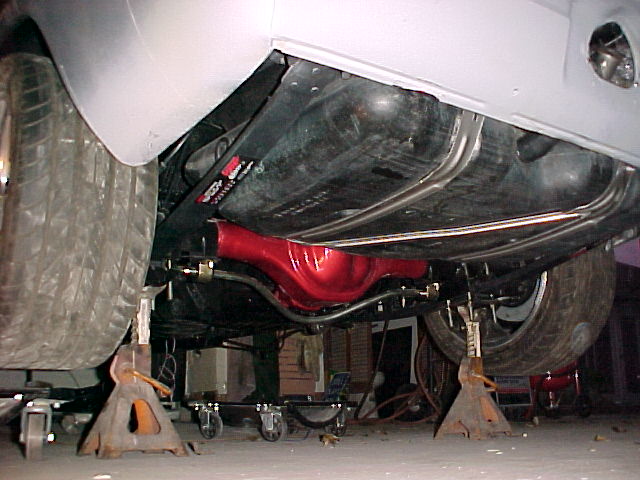
Now we are getting somewhere! Mike Britts finished the rough build of the FORD 9" widened to the correct length to make the positive offset of the 18" 5th gen Corvette wheels. It is fitted with 4th gen F body disc brakes. The axle is mounted using VB&P fiberglass springs. These next shots show the first test fit of the FORD 9" axle.
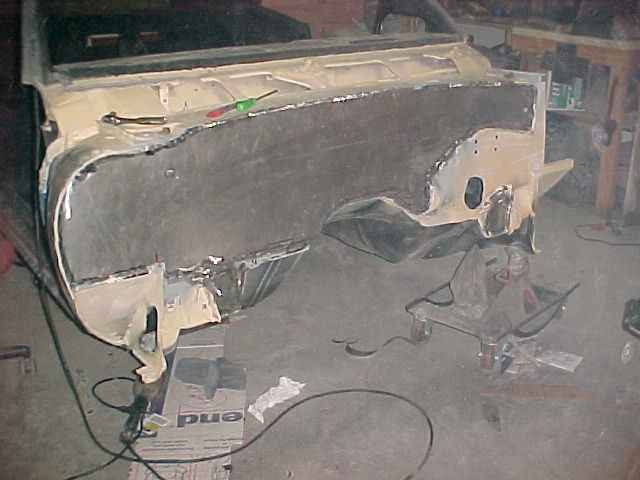
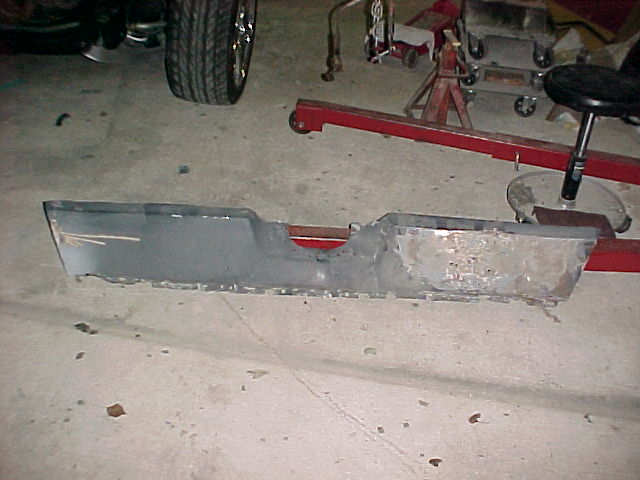
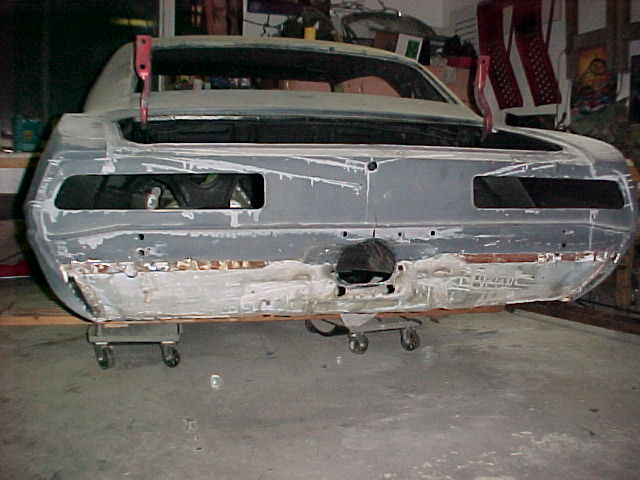
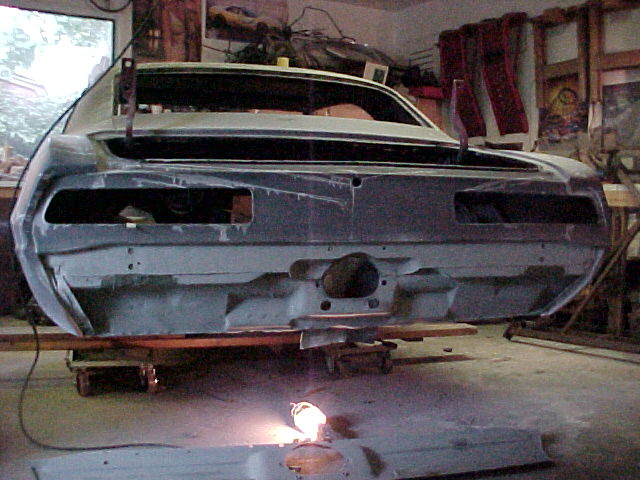
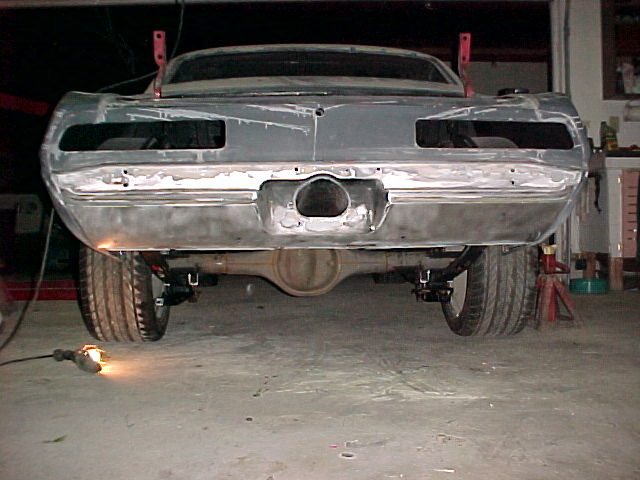
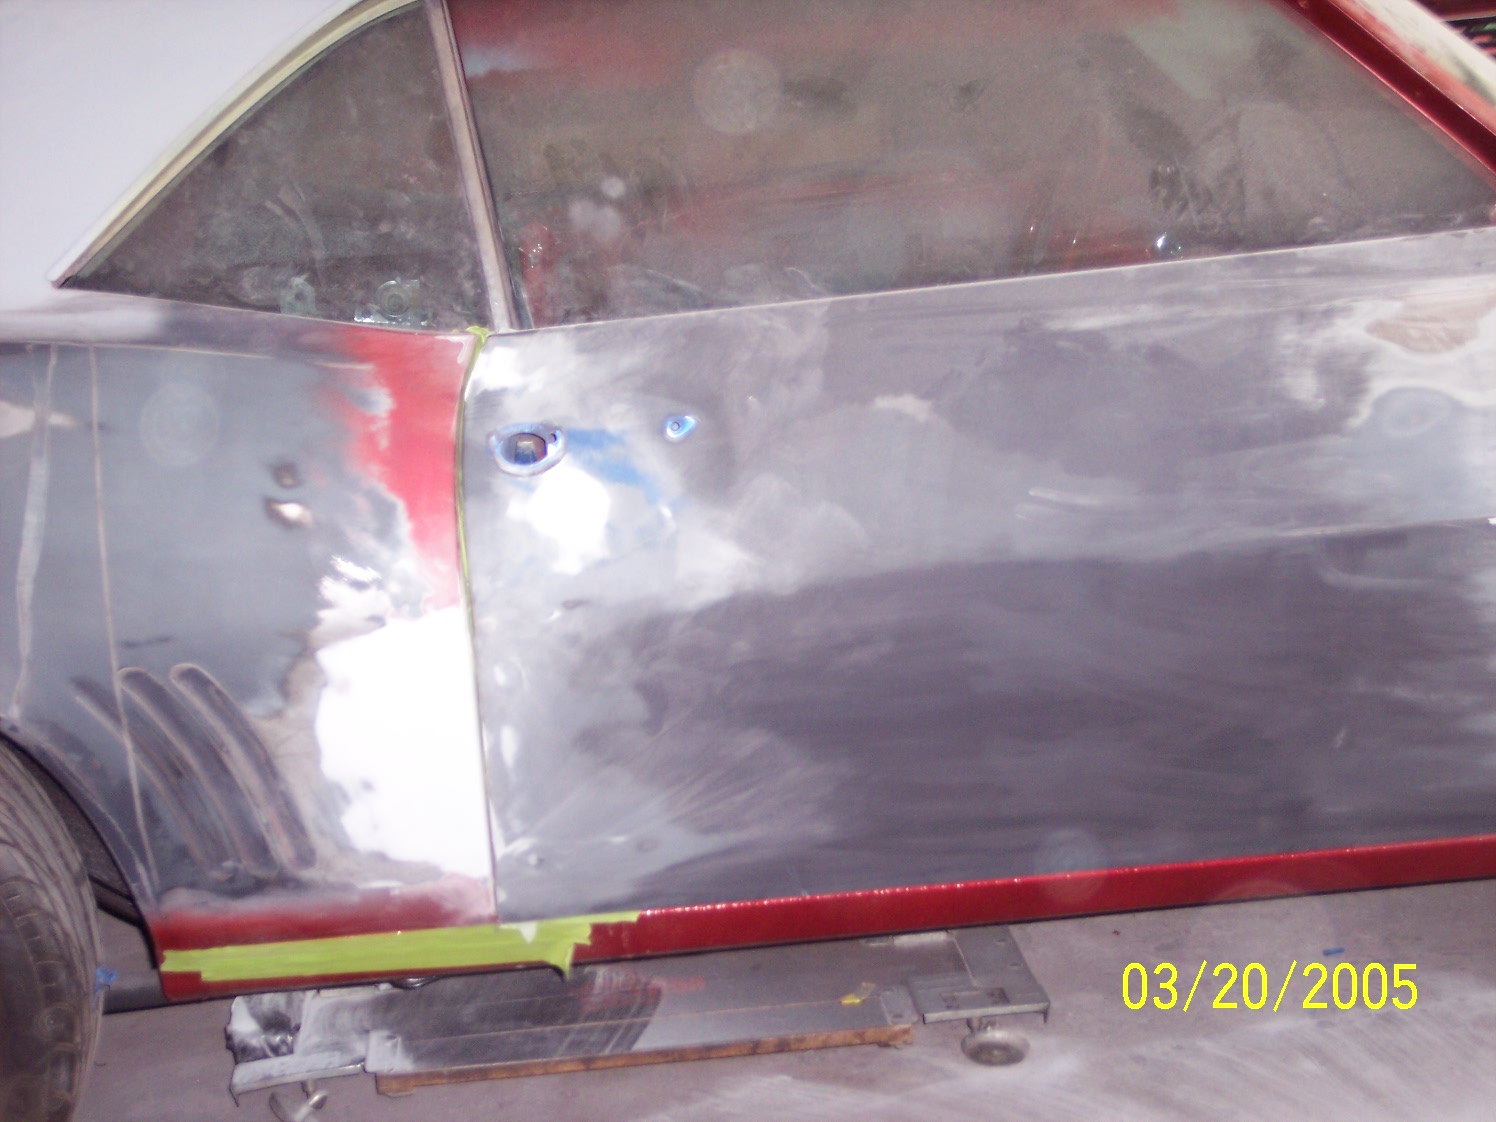
Taking a brief pause for Hurricane Frances, I finally got around to replacing the rear panel. Other than surface rust, the area was clean; that is if you can over look the pound of bondo! Instead of changing the WHOLE rear panel, I cut and sectioned it at the rear bumper line. After prepping the under surface and a liberal coat of ZINC enriched weld through primer, I spot welded the new panel in place and lightly filled the weld spots.


9/25/04

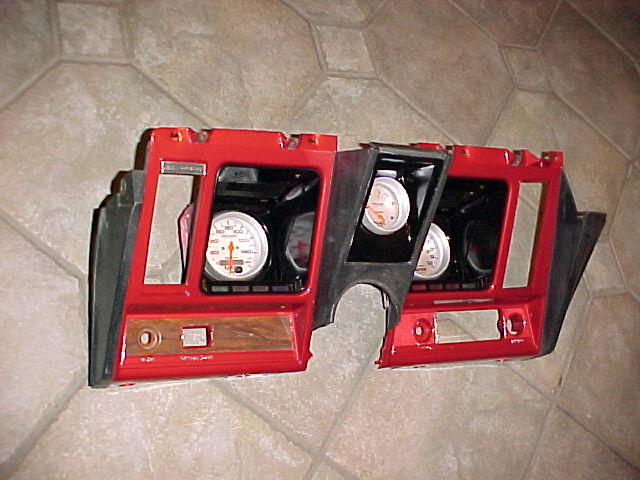

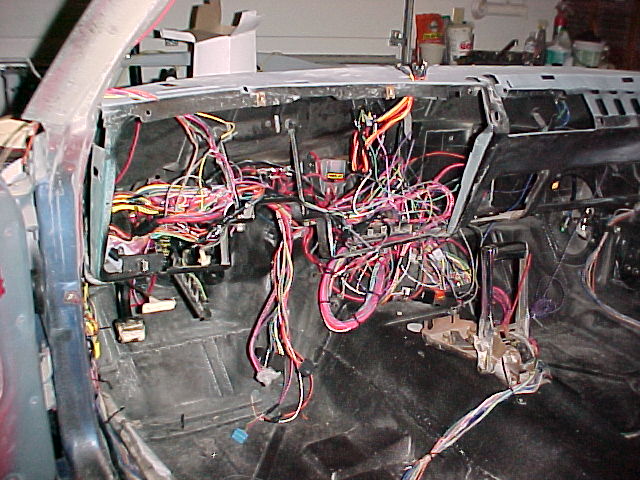


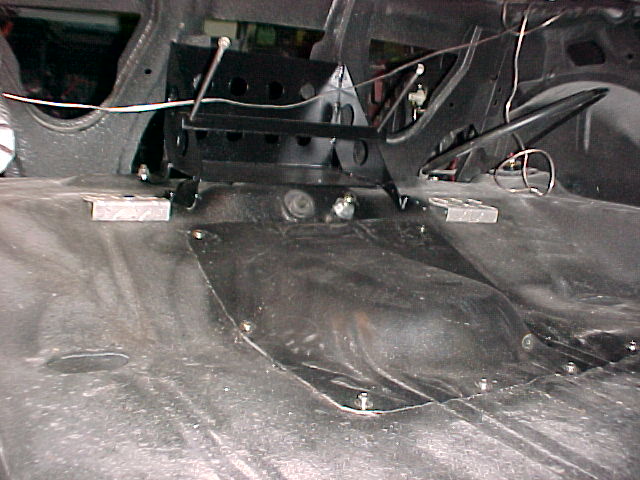
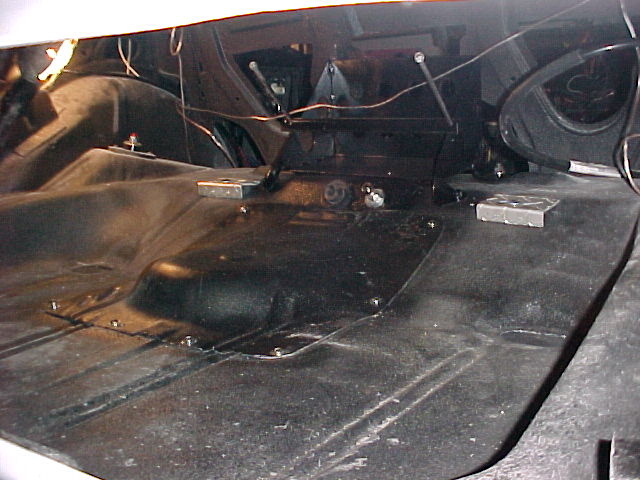
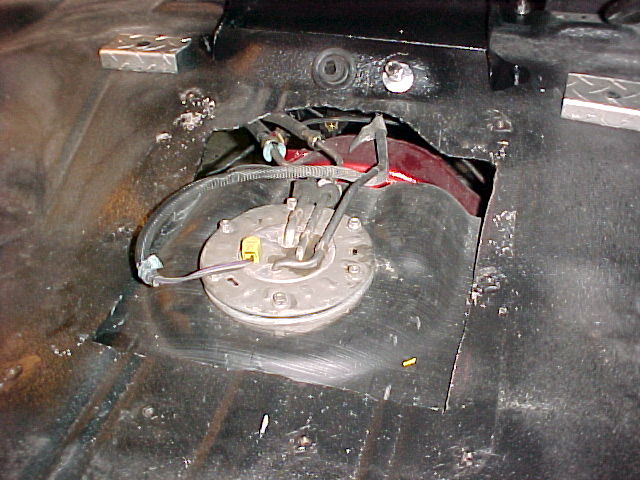


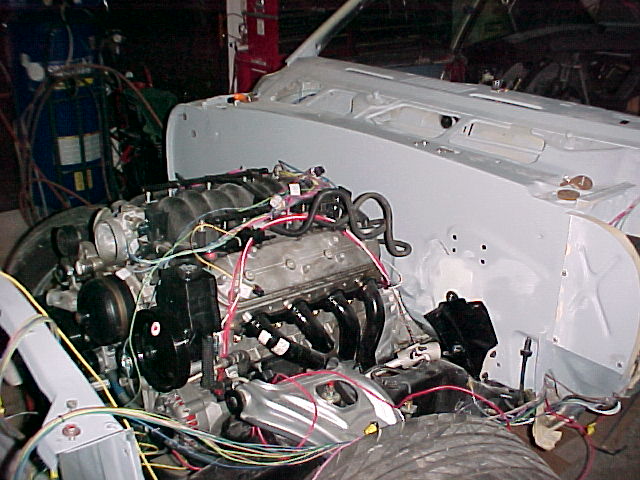
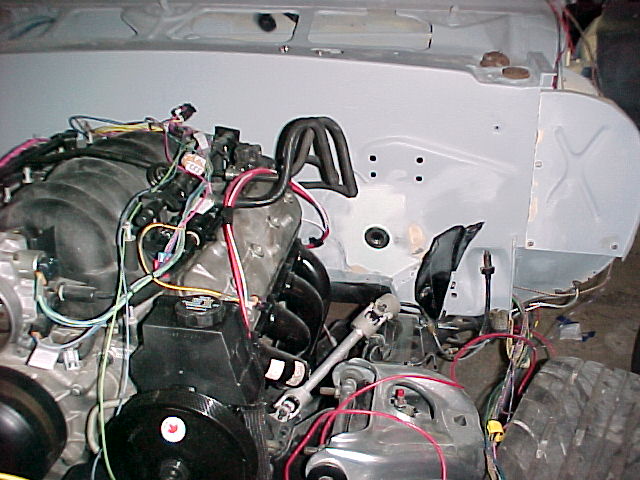
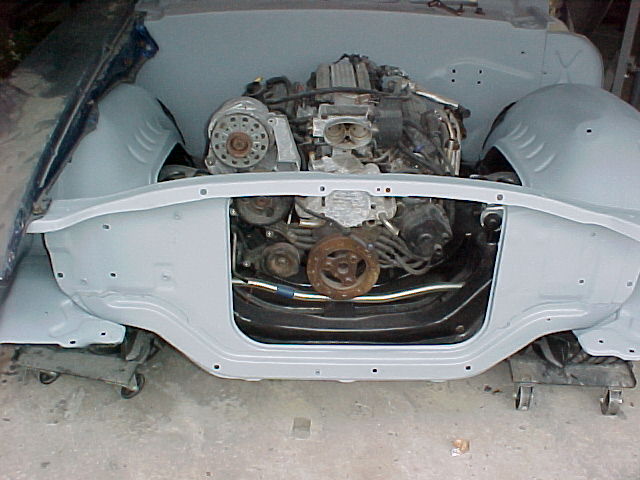
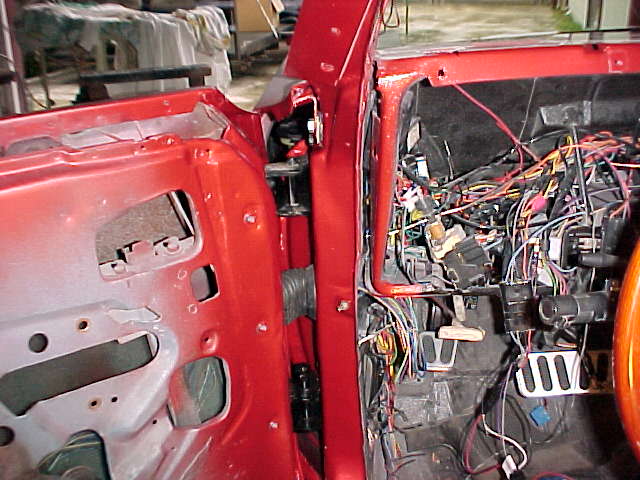
The following pictures document the LS1 test fit, custom IP with Autometer gauges, Painless Wire Harness install, computer install, power window conversion from the 1996 Caprice, plastic fuel tank install from the 1996 Caprice with trunk access and rear batter mount.
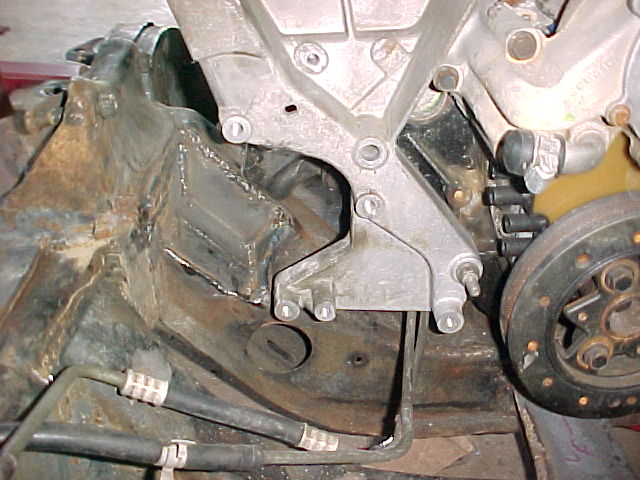
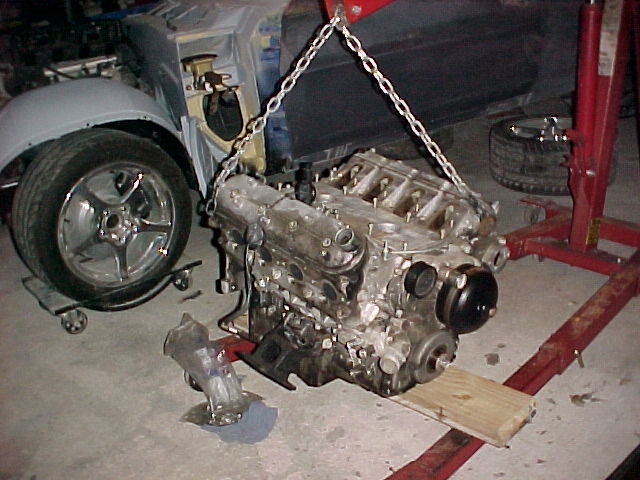
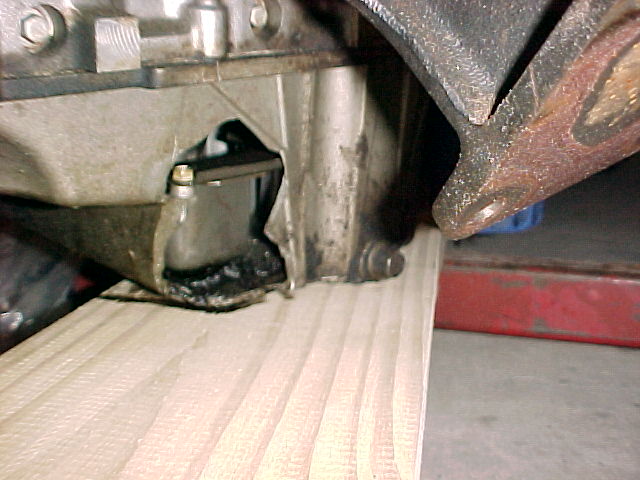
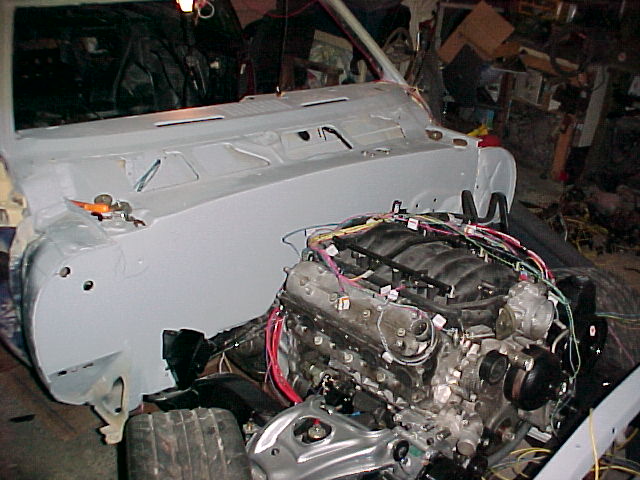
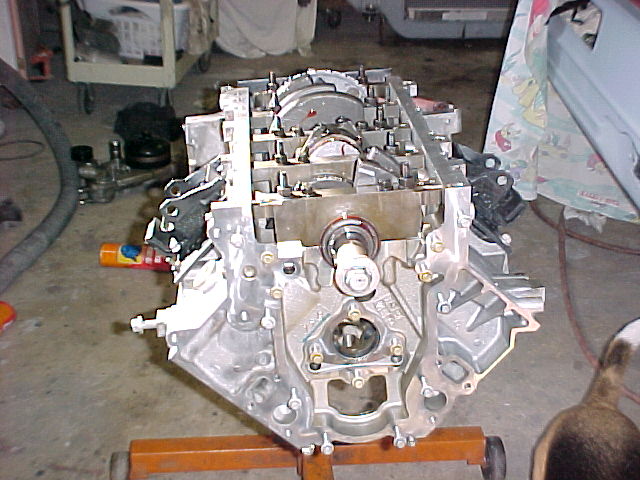
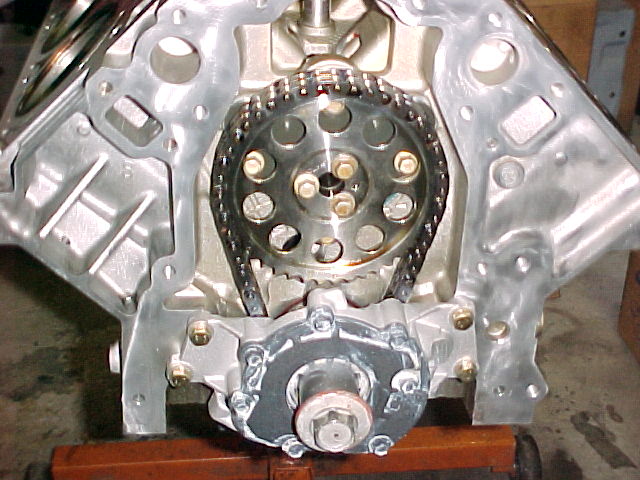
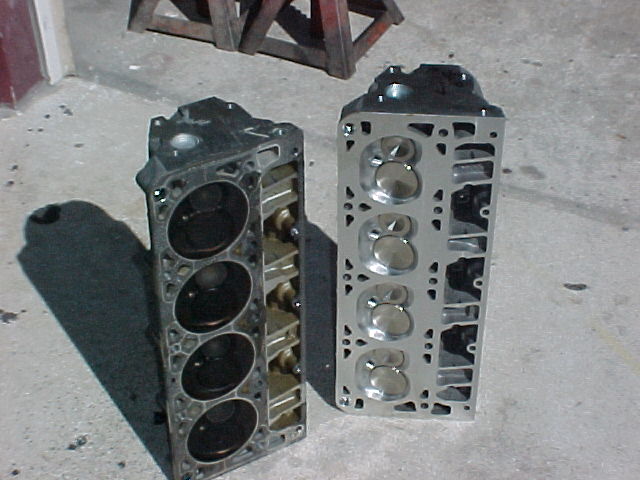
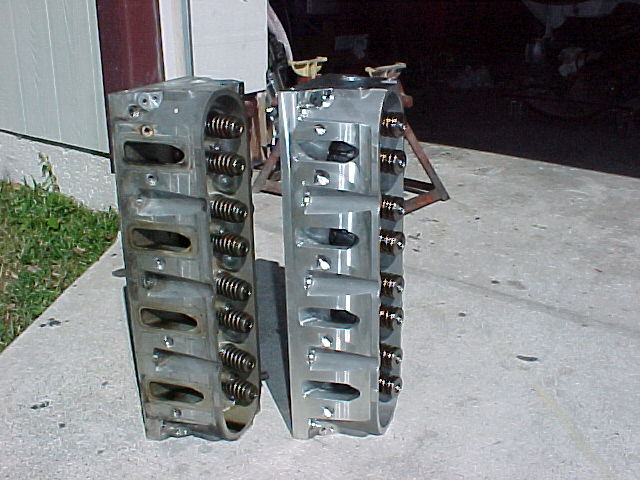
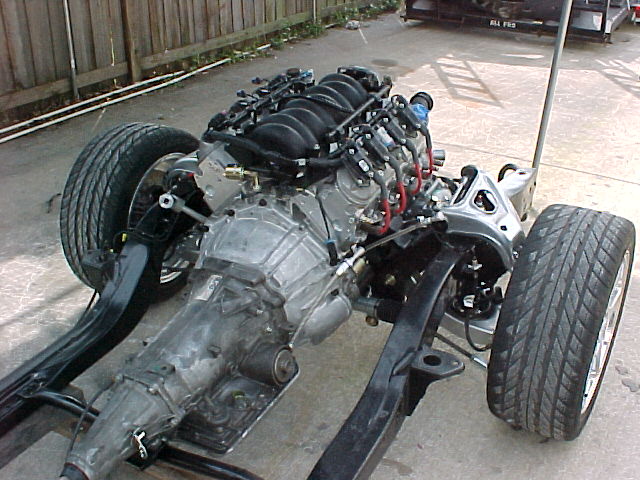
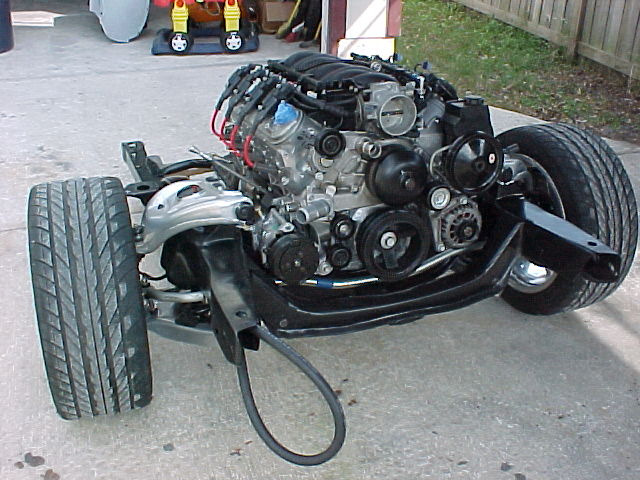
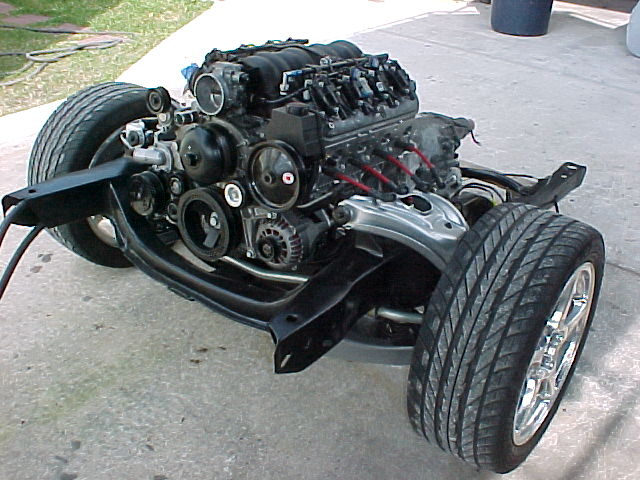
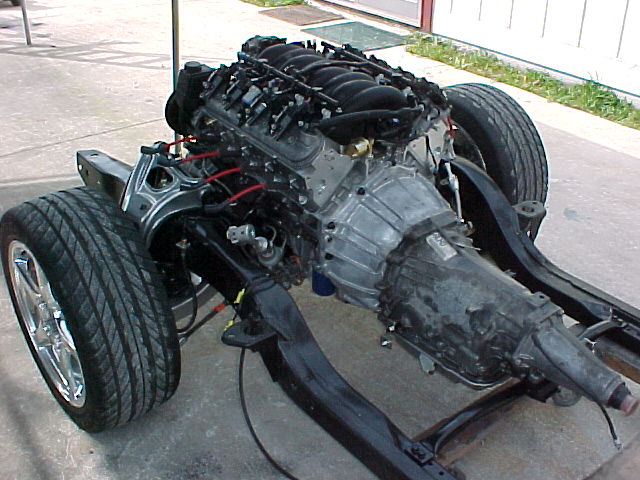
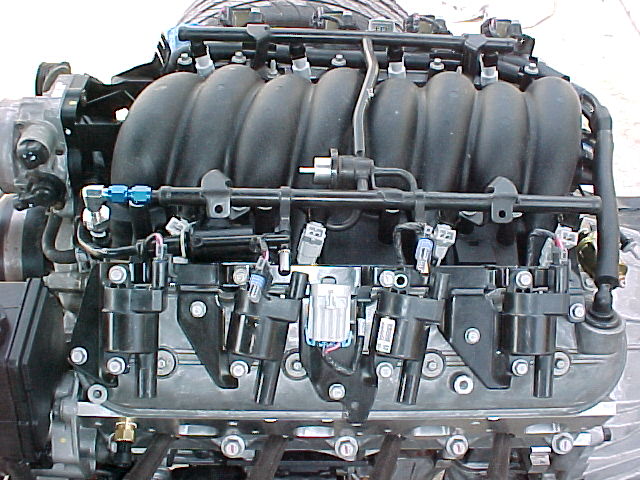
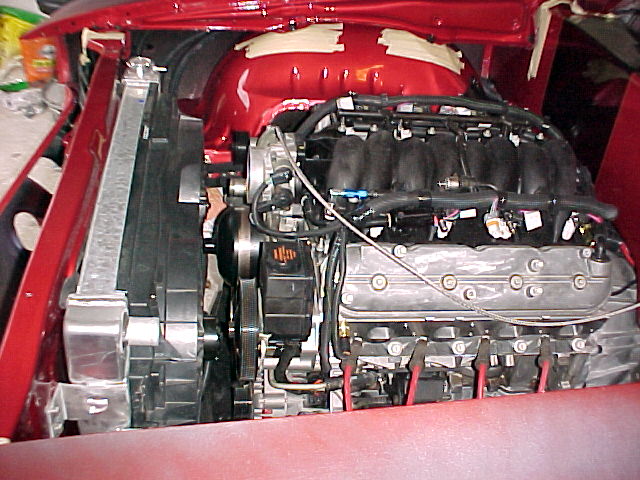
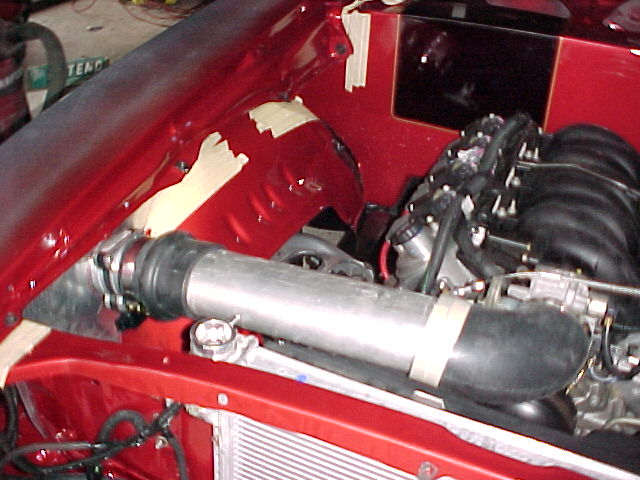
I found the problem in this LS1 was #2 & #3 mains from the engine running without oil. The block was fine. I was able to get the crank turned and new matched bearing and rings to freshen the lower end. I topped it off with a set of SLP Stage III heads and cam with LS6 intake, matching pushrods, high volume pump, roll master chain, 35# injectors, 160 thermostat housing, and some other goodies. We rebuilt the trans and installed a 2,800 stall from TCI. The engine and trans is now in the subframe waiting for the jam paint to be finished before going to the next step. You can also see the minimal clearance between the Steeroids rack and the custom oil pan.


Click here to add your text.
Click here to add your text.
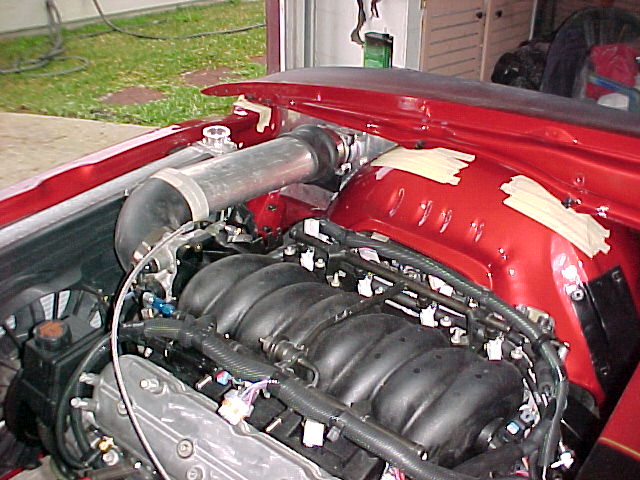
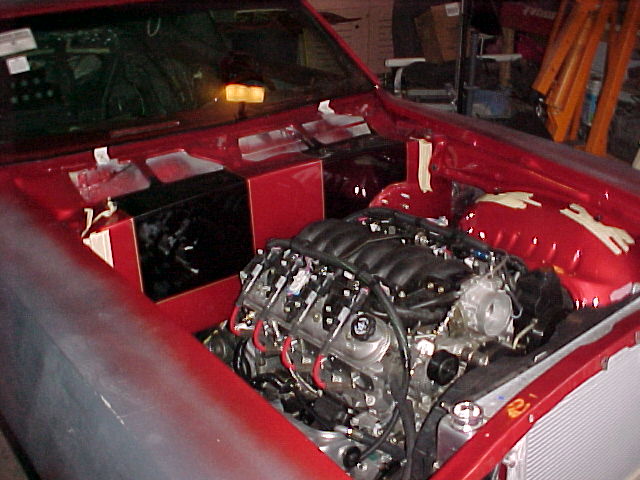
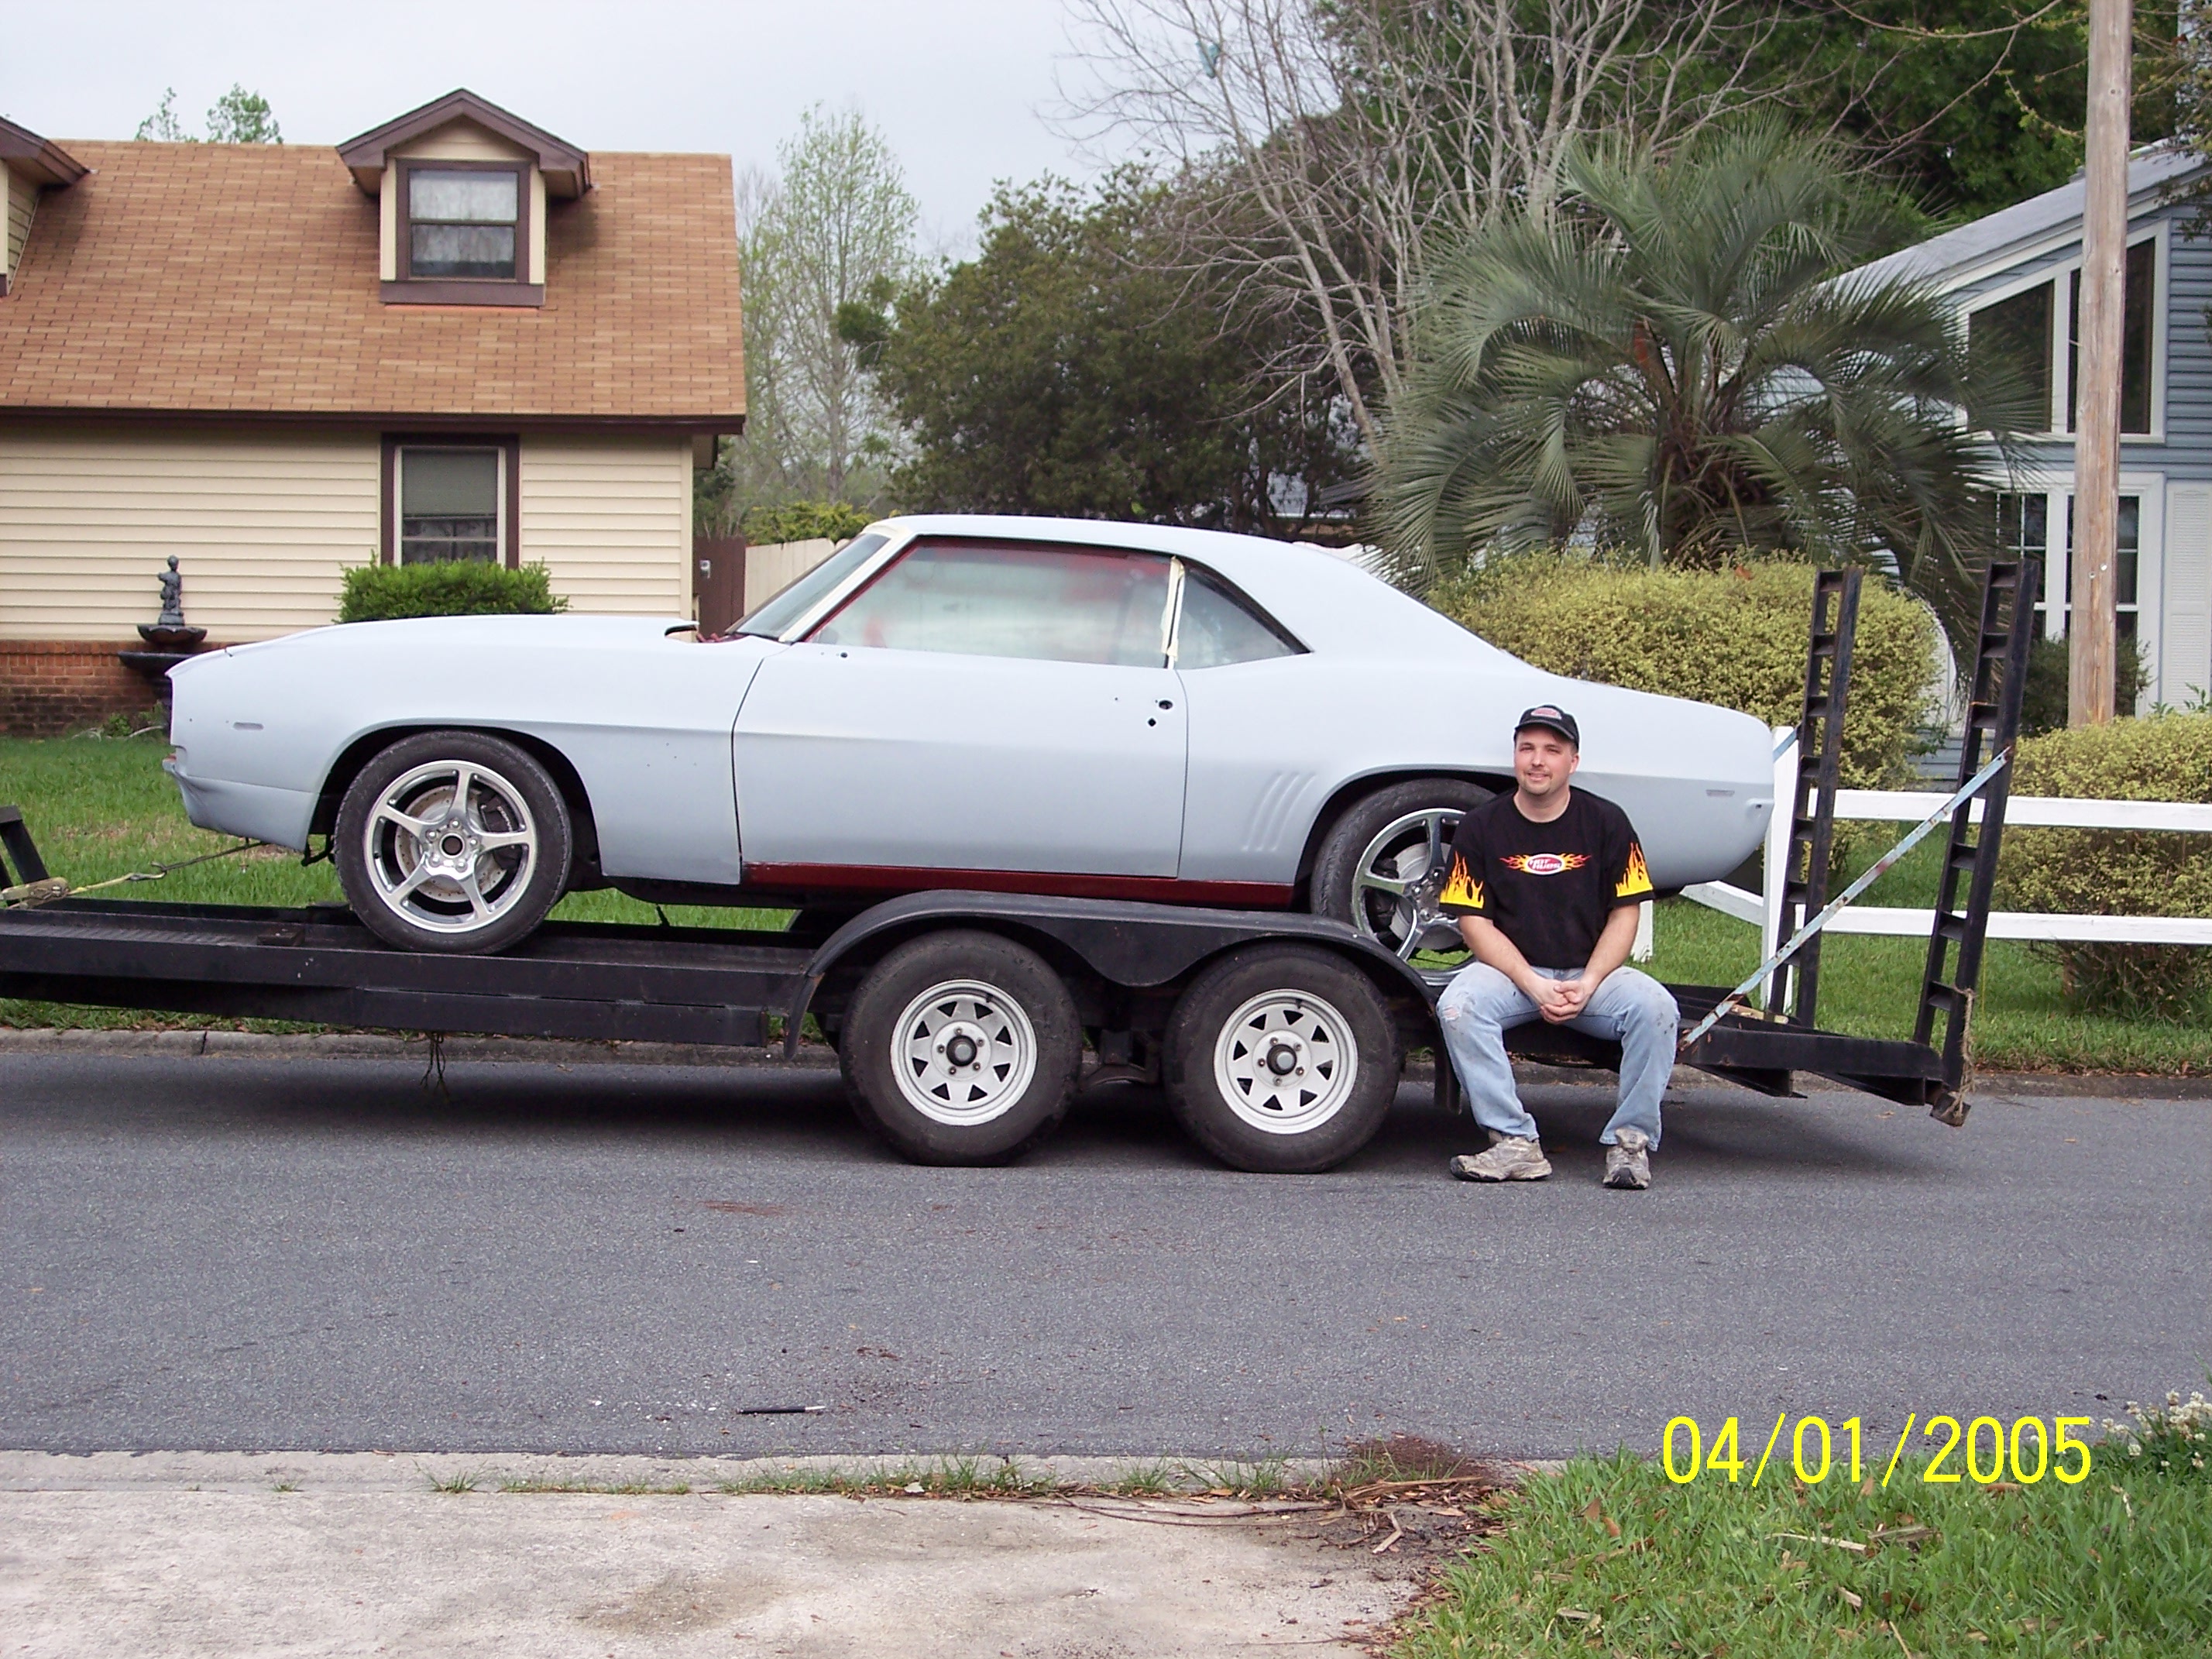
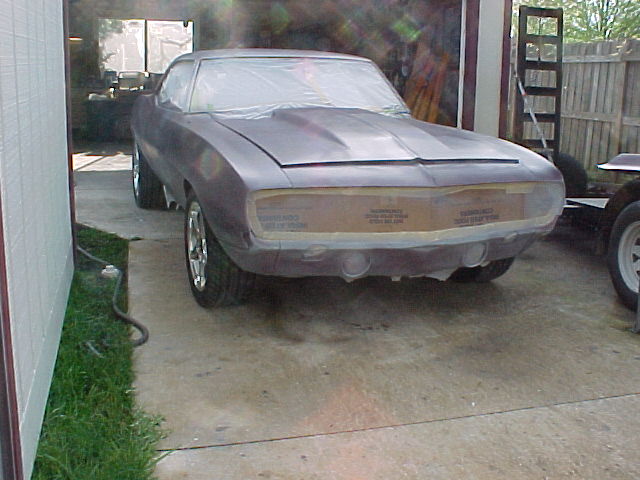
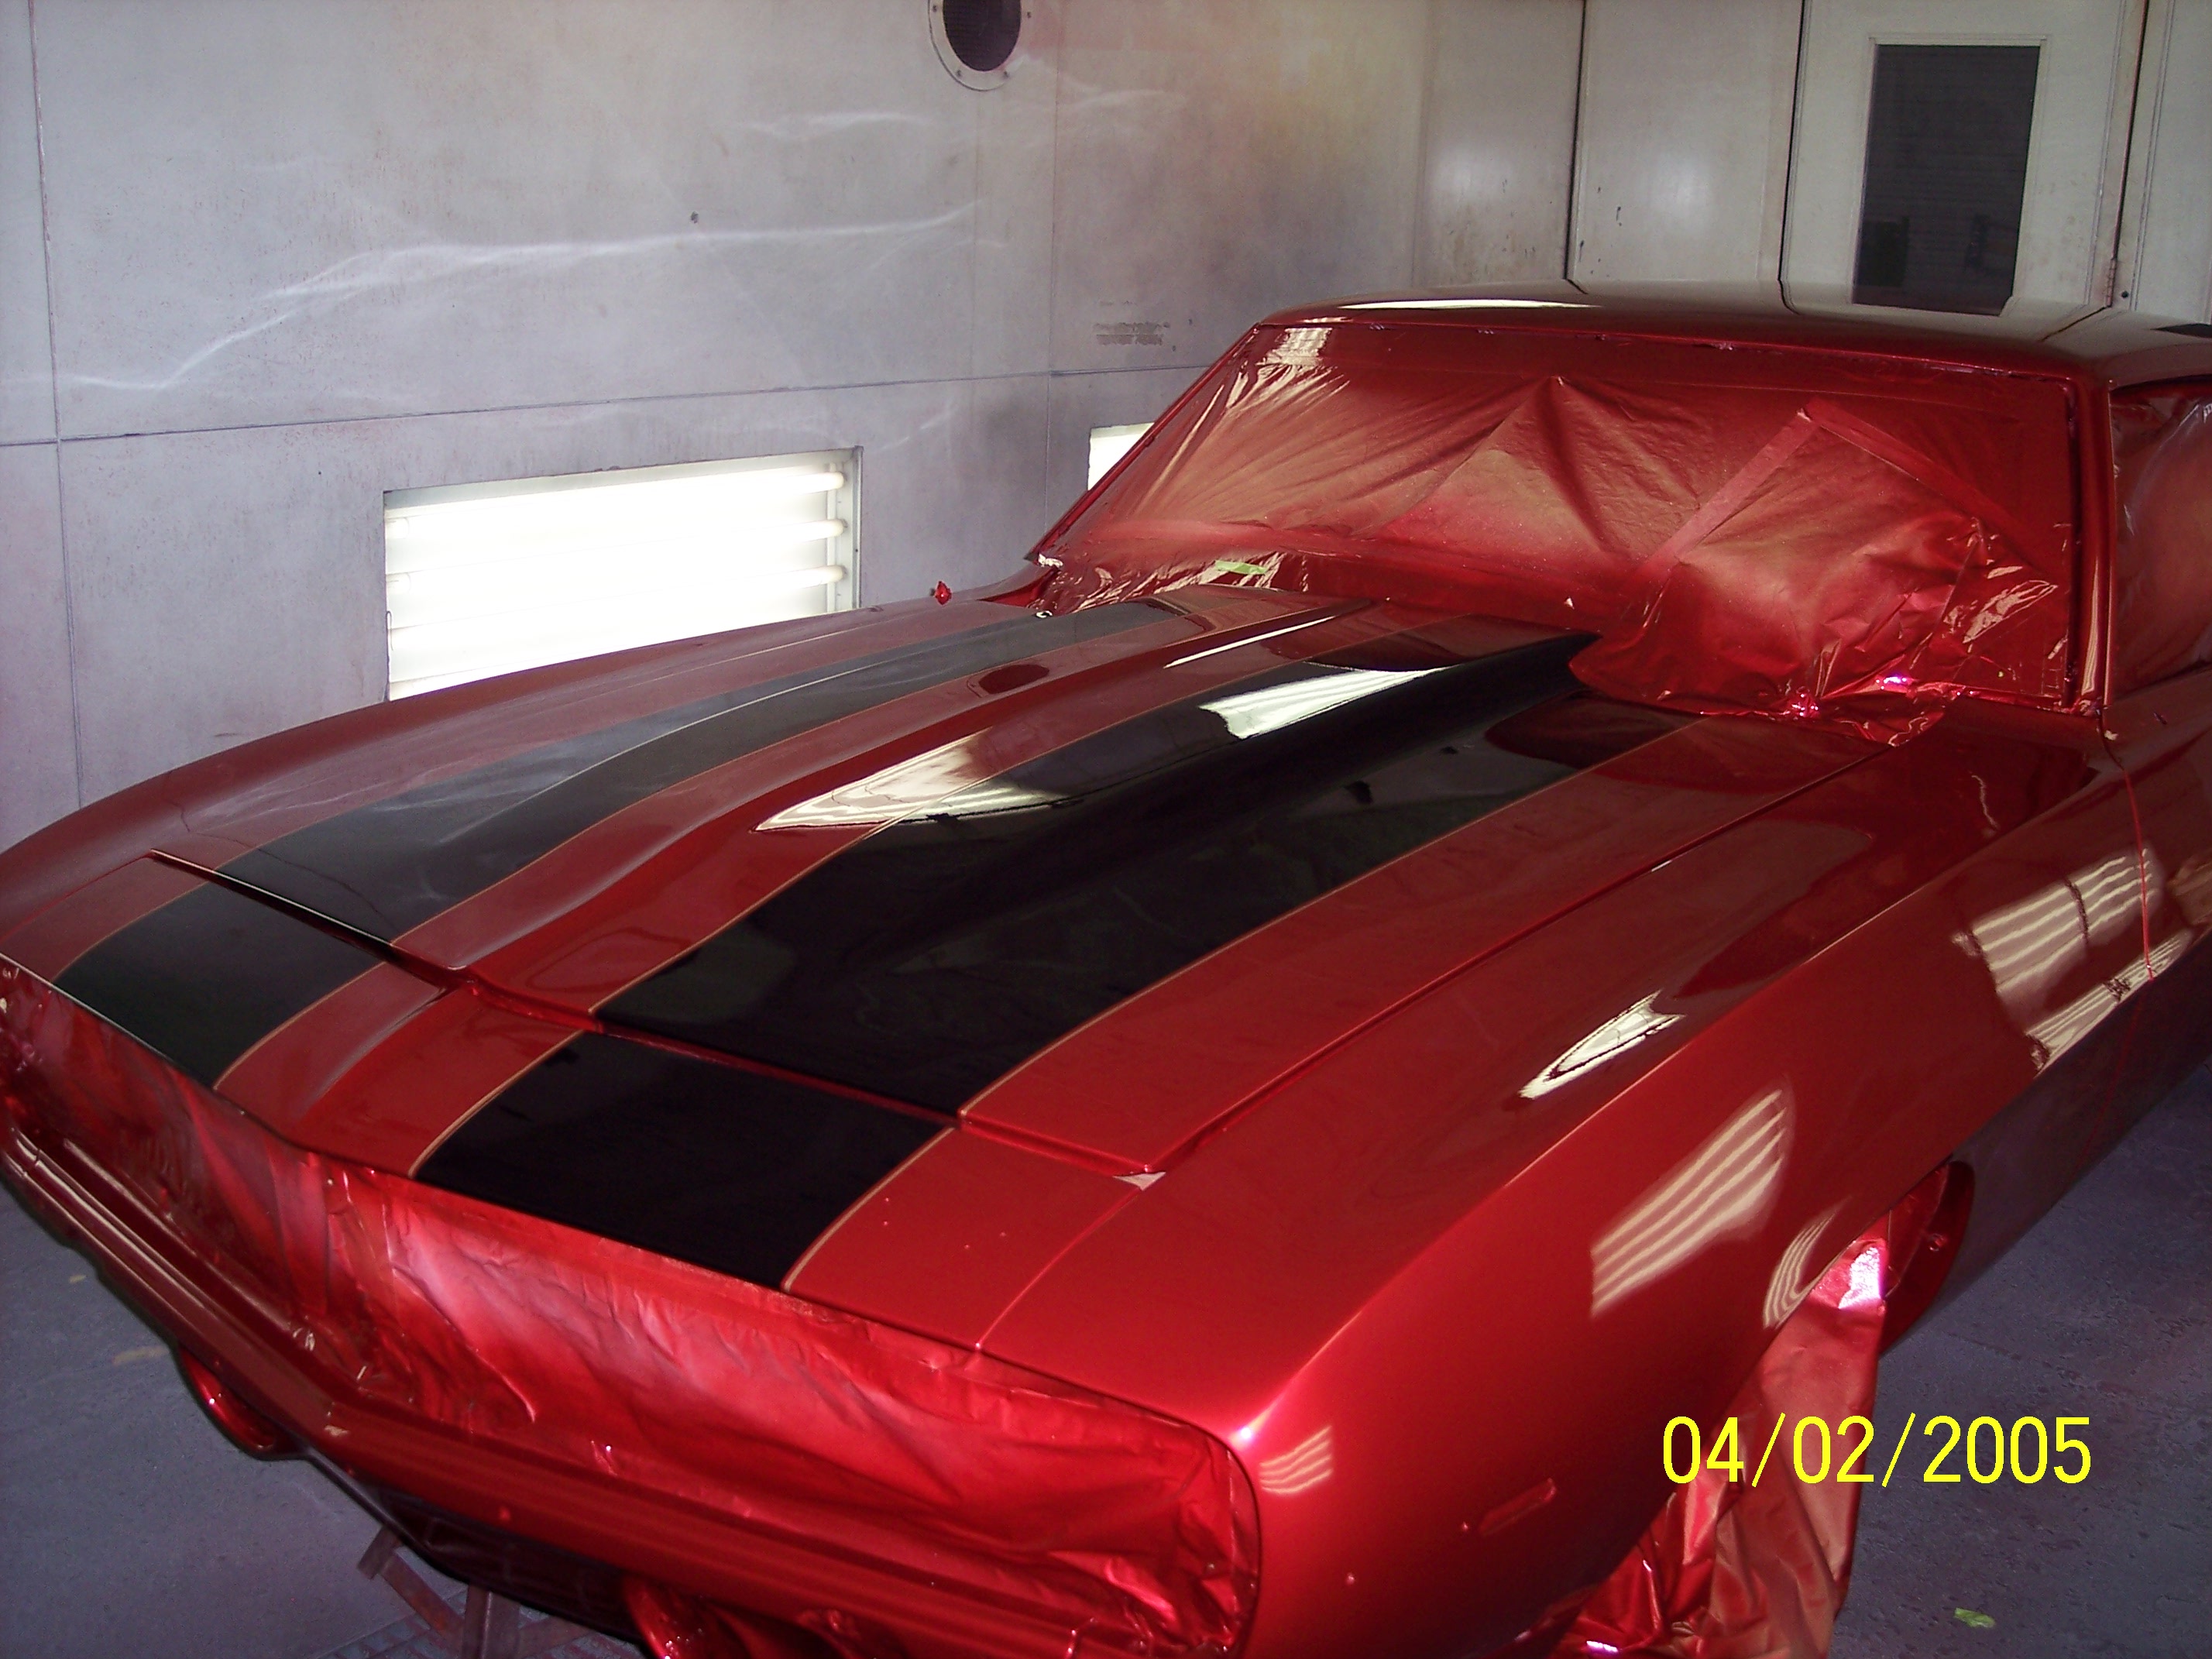
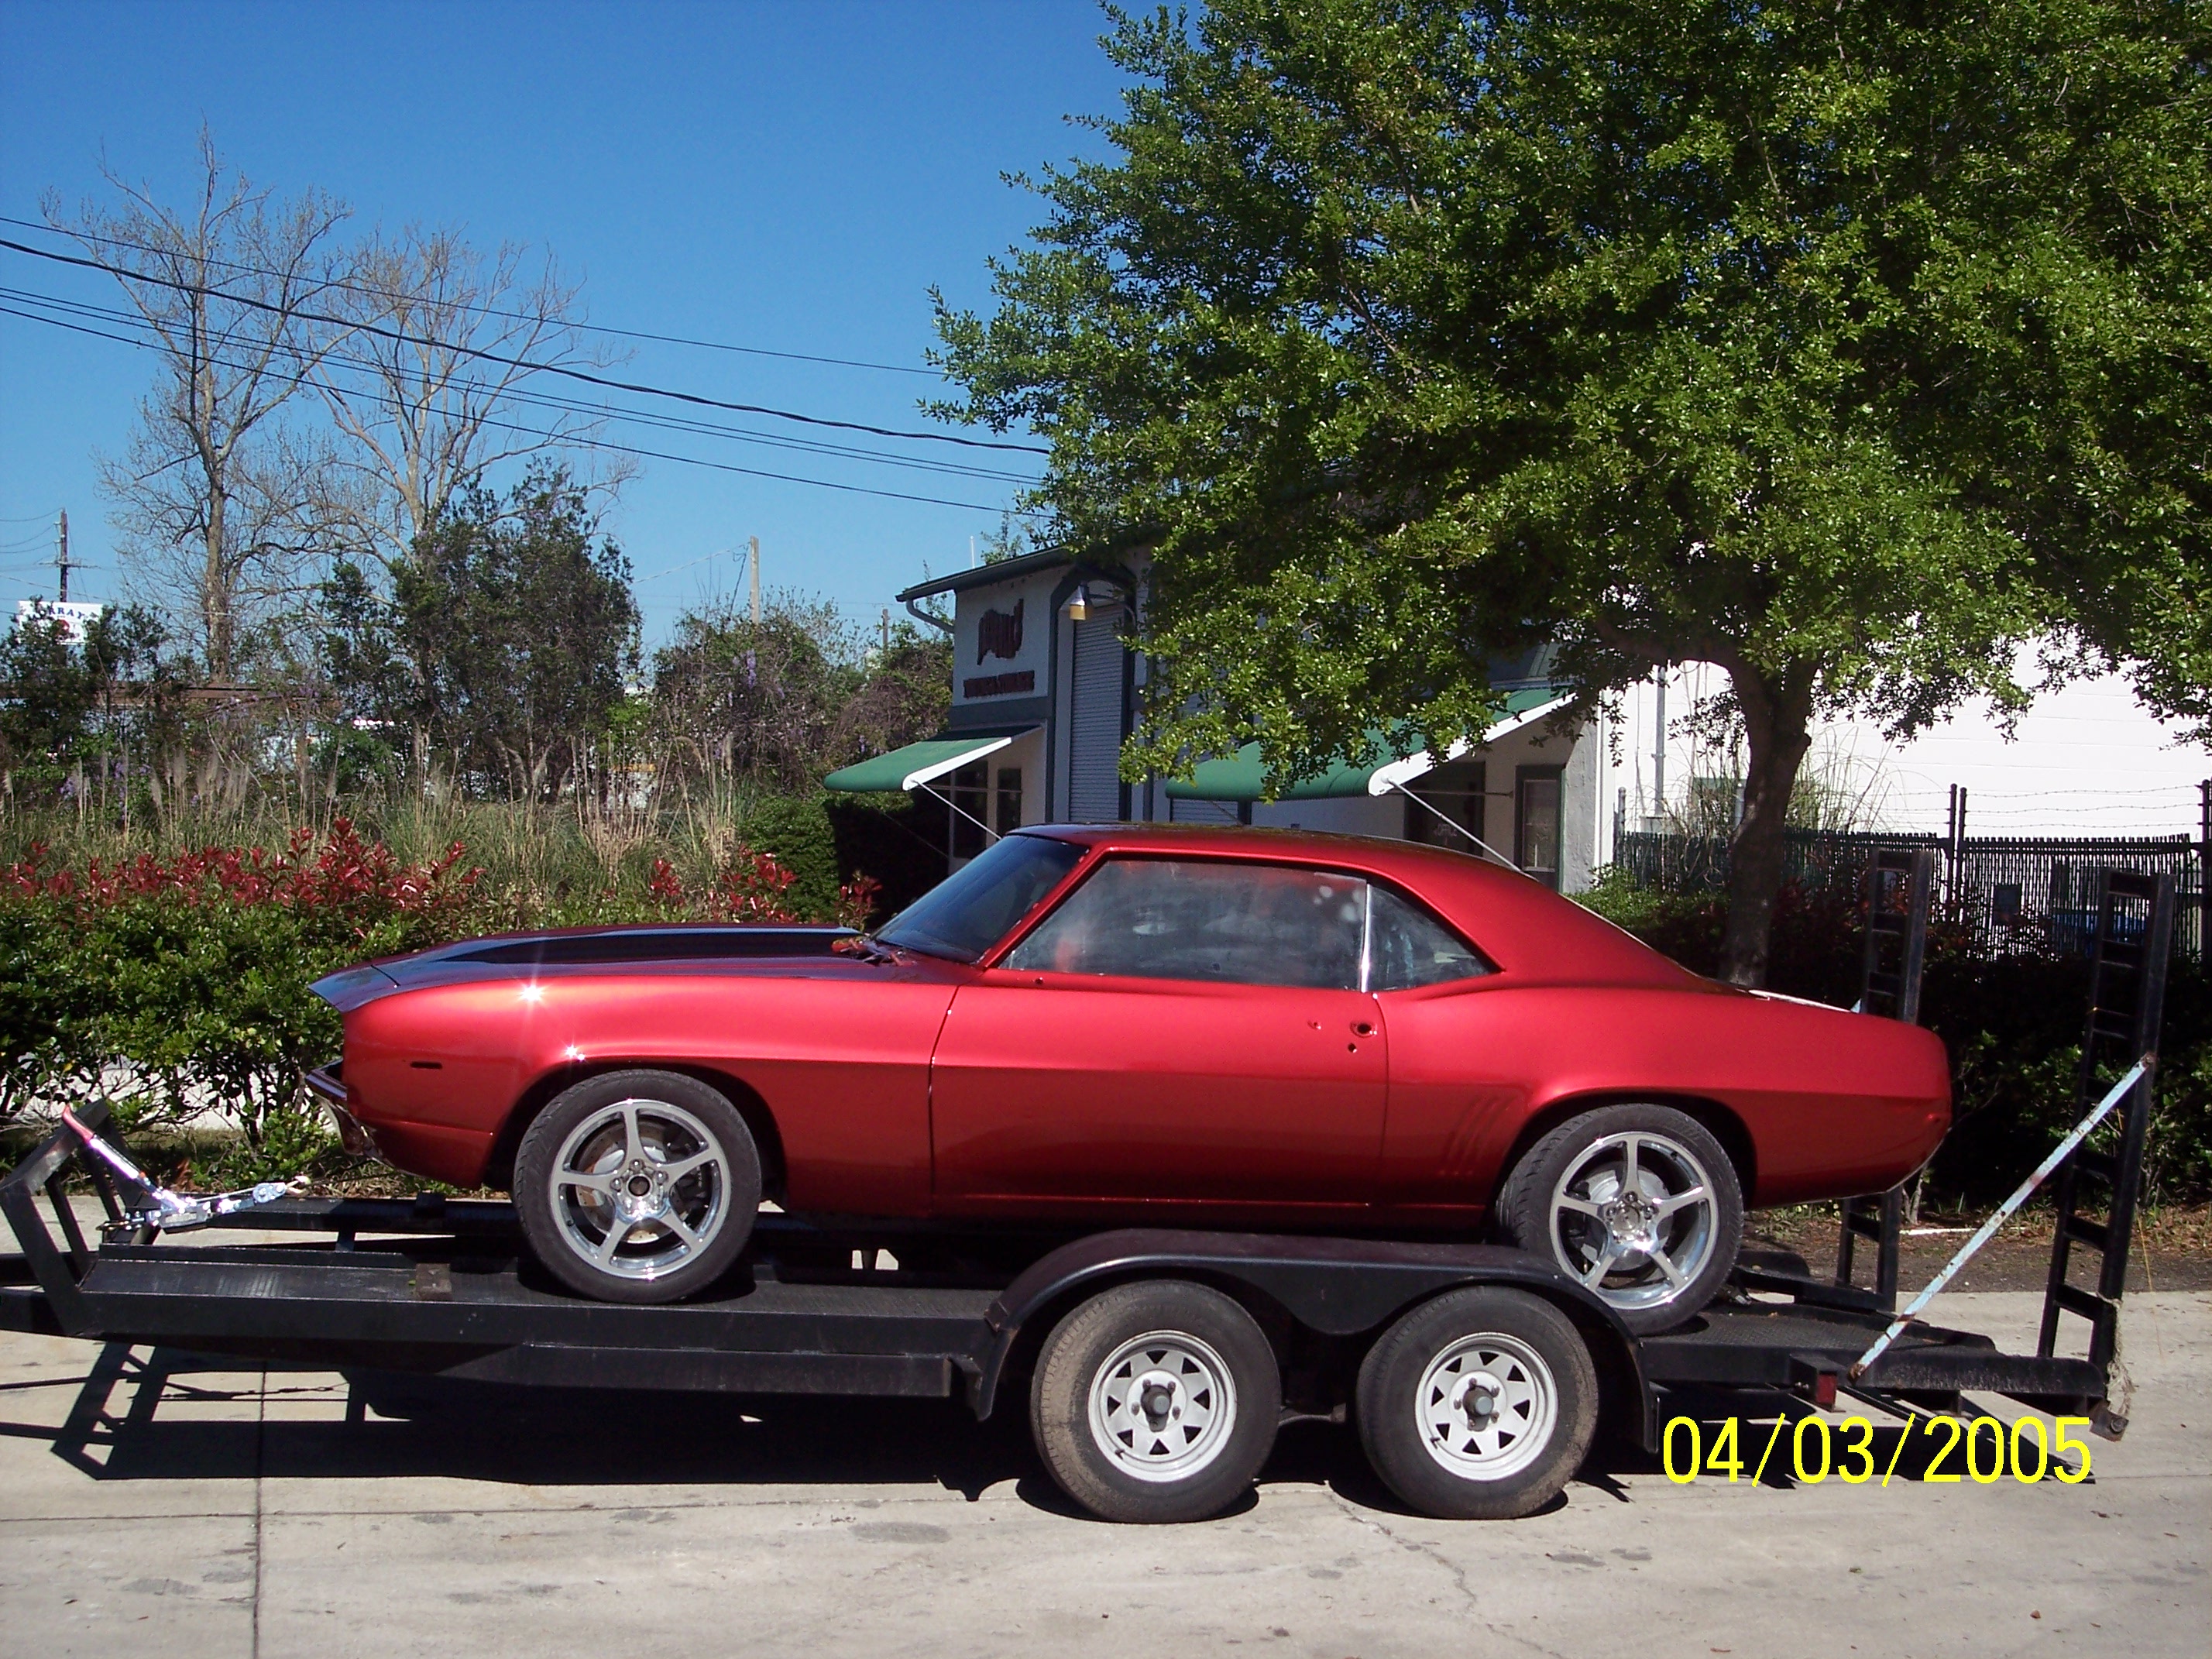
Click here to add your text.Now that the body is painted, it is time to slap on the weatherstrips, interior, and get this LS1 running! Check out the crazy header mod. I am having to fit this 2000 non-emission Z28 headers around the Steeroids rack. I first made a mock up, then took it to Jimmy Britts to make the pipes work.

Almost Finished! Check out the updated pictures here:
